WakeBright
Introduction
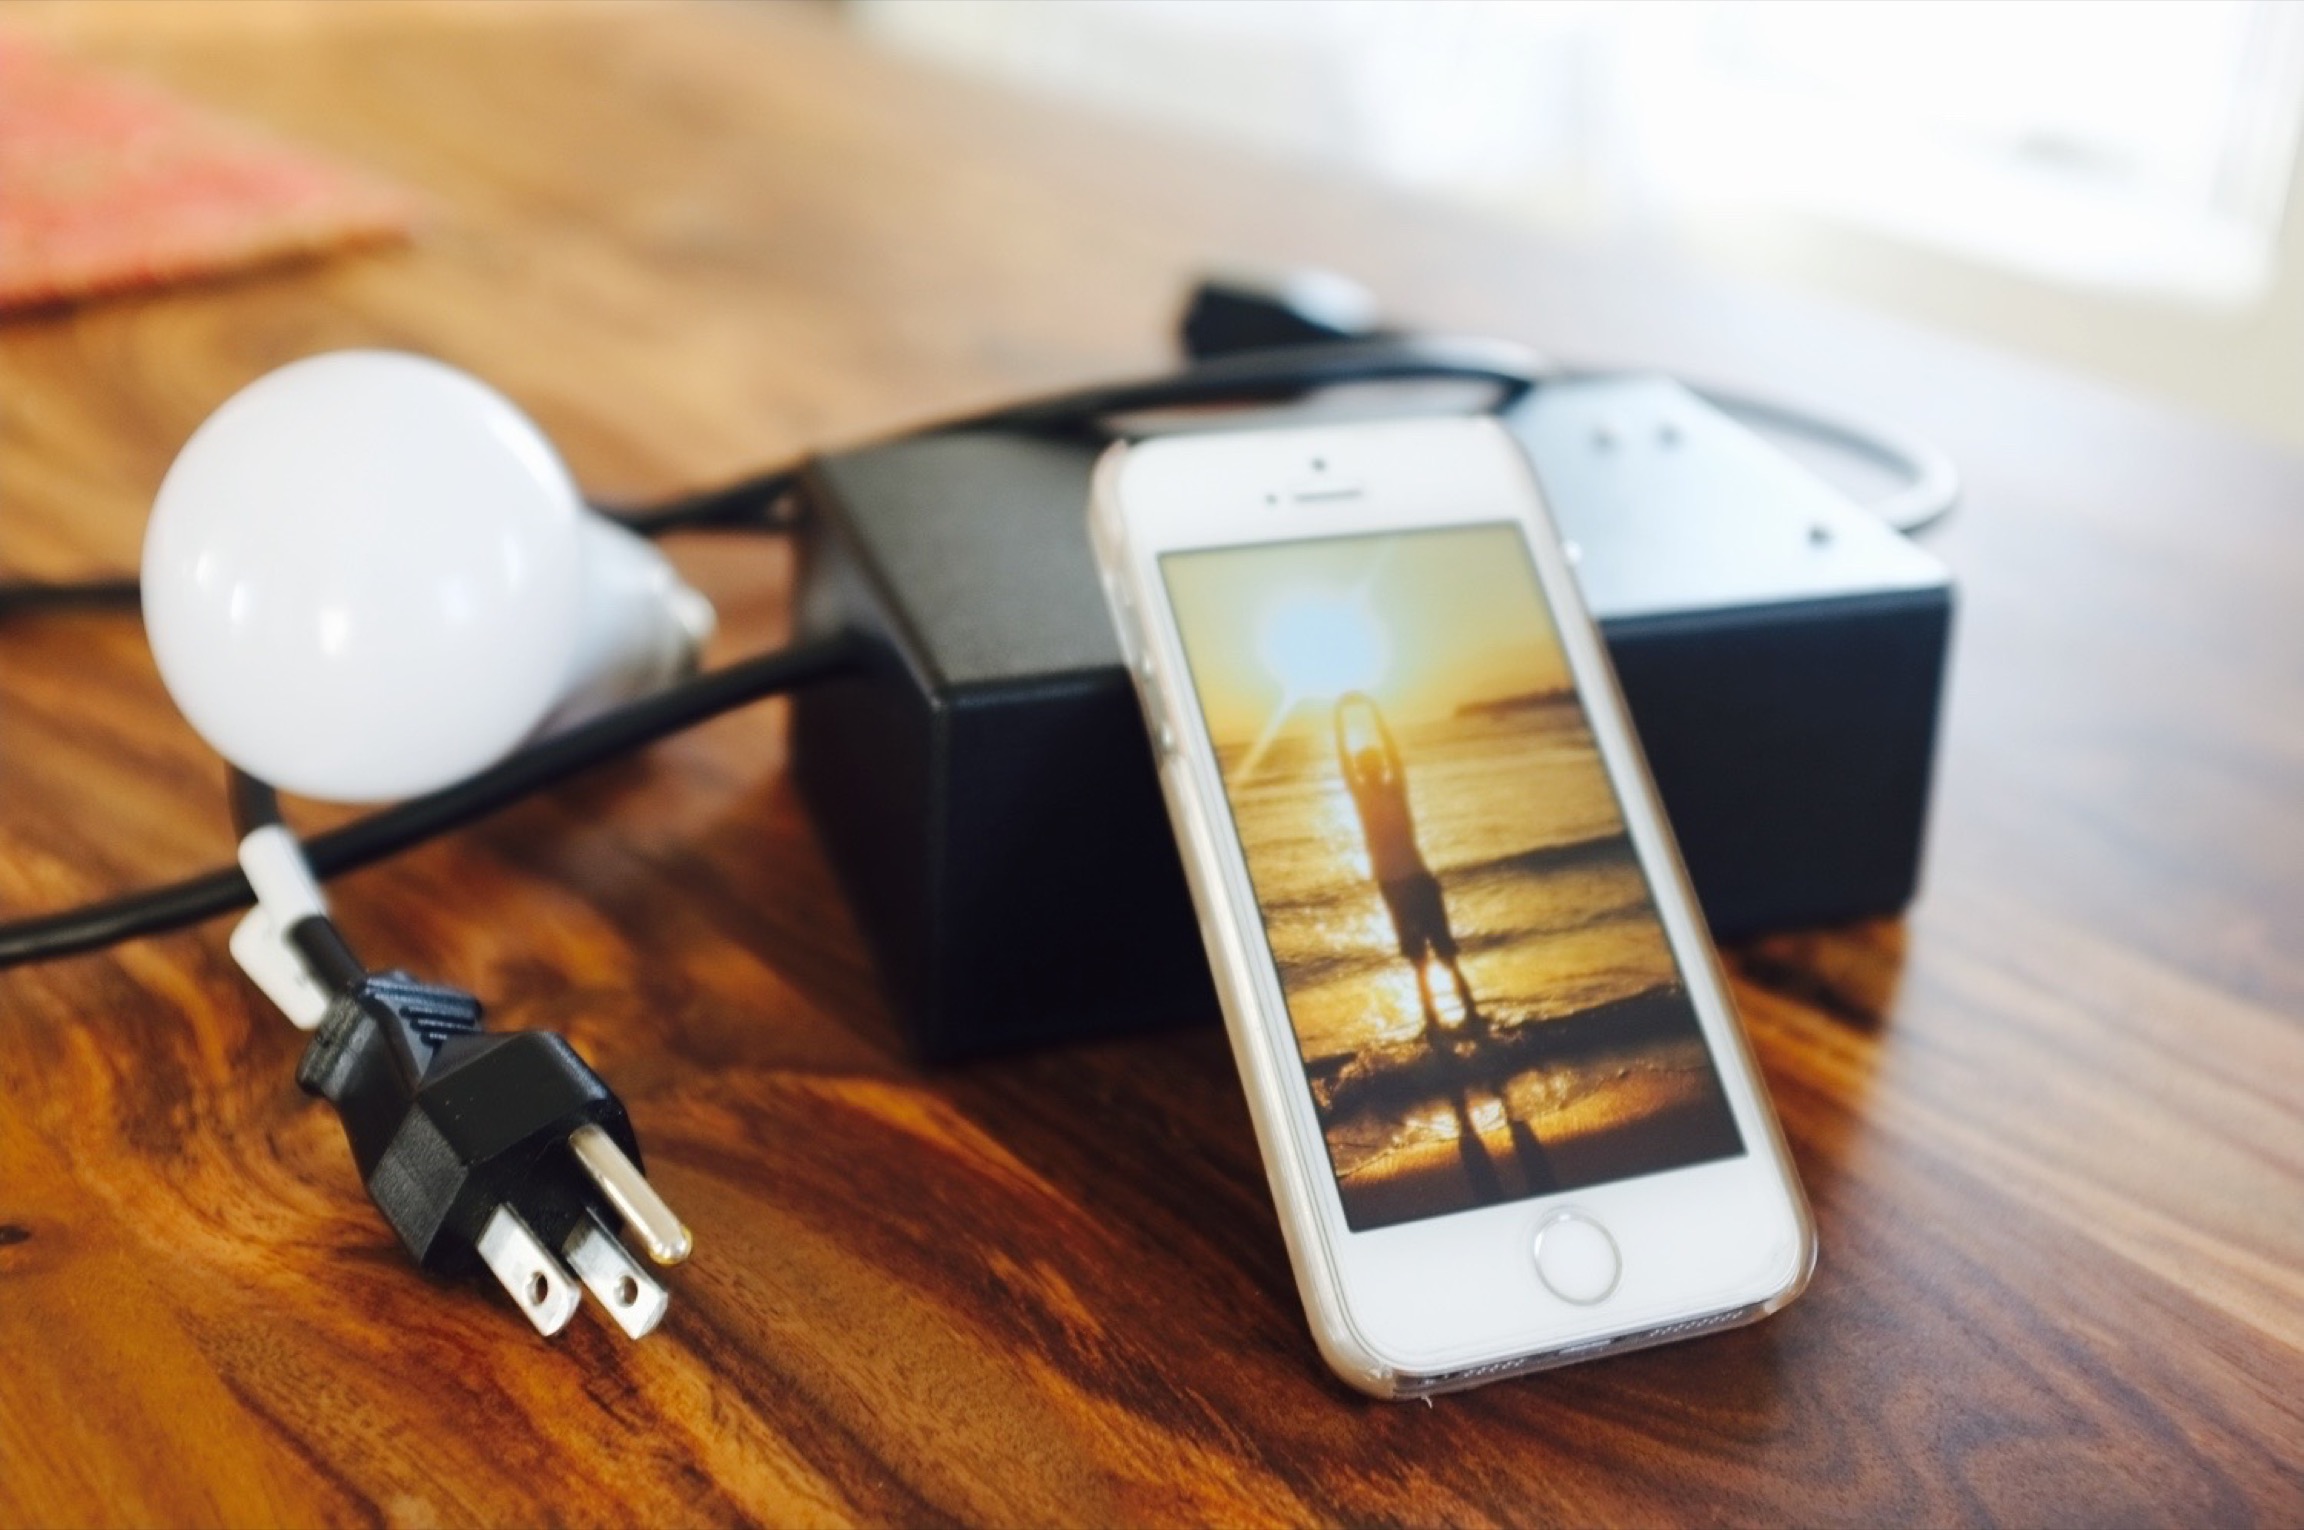
WakeBright is a morning alarm system designed to naturally awaken you with light. The WakeBright hardware connects between any lamp and a power outlet - allowing the WakeBright iPhone app to control the brightness of the lamp over Bluetooth 4.0. Using the WakeBright system is as simple as setting an alarm on your smartphone and choosing when you want the artificial sunrise to begin.
This project was a contract job completed for a group of Harvard Business School students.
Light Dimming Principle
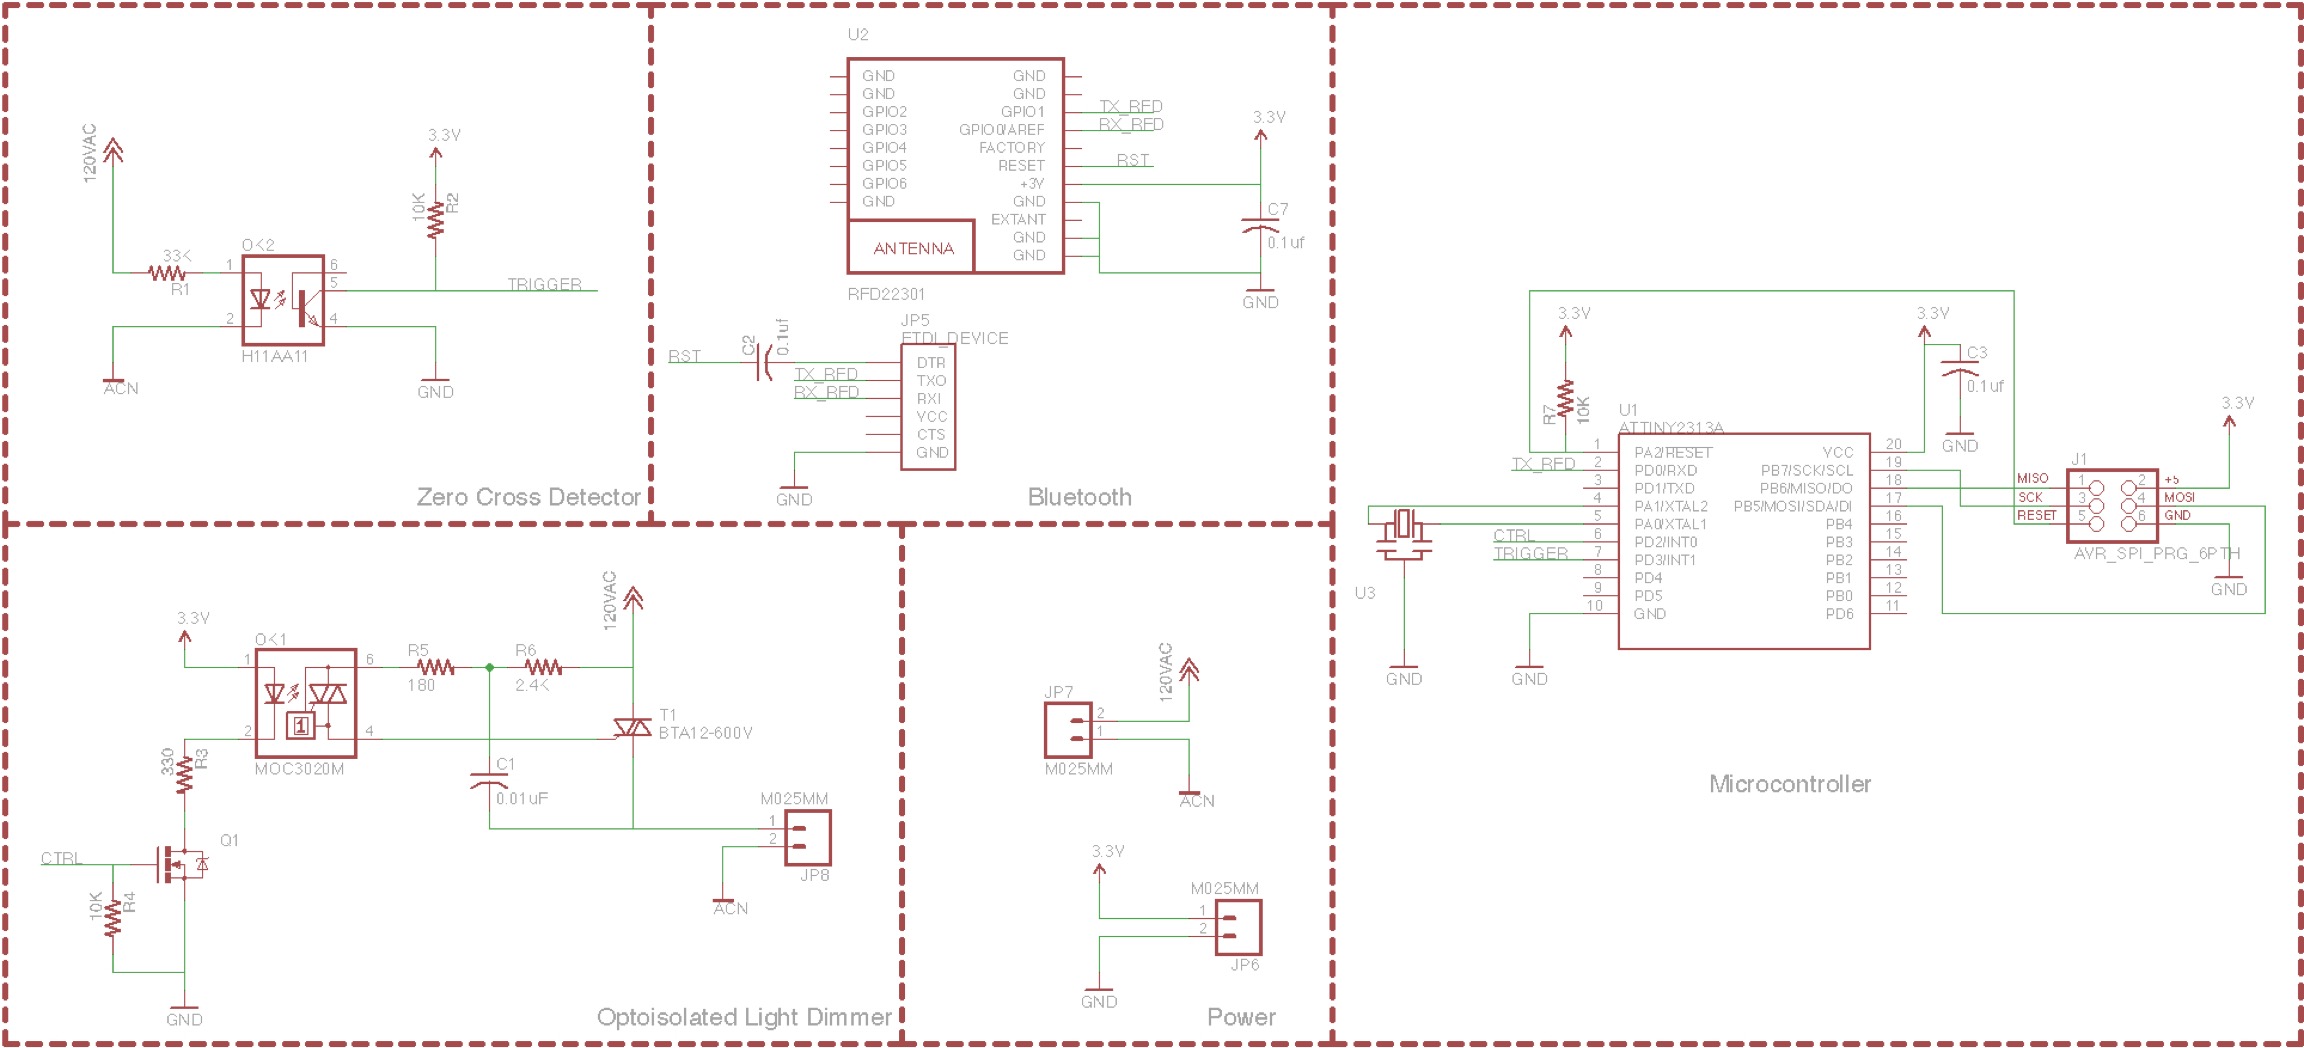
At the core of the WakeBright hardware is a light dimming circuit. This is what allows the hardware to set the brightness level of the lamp. WakeBright uses what is called 'phase-cutting' to accomplish this. To dim a lamp, this circuit sends only a fraction of the AC sine wave coming from the wall outlet to the lamp. This is a two step process. First the hardware has to sync up with the AC sine wave so that all "cuts" are relative to the same point on the wave. This is done by detecting the zero-cross point of the wave. Secondly, based off of the set brightness level, the hardware has to wait a certain amount of time from the half-period reference point before turning the lamp on.
This concept is explained more in the resources that I used to make this project.
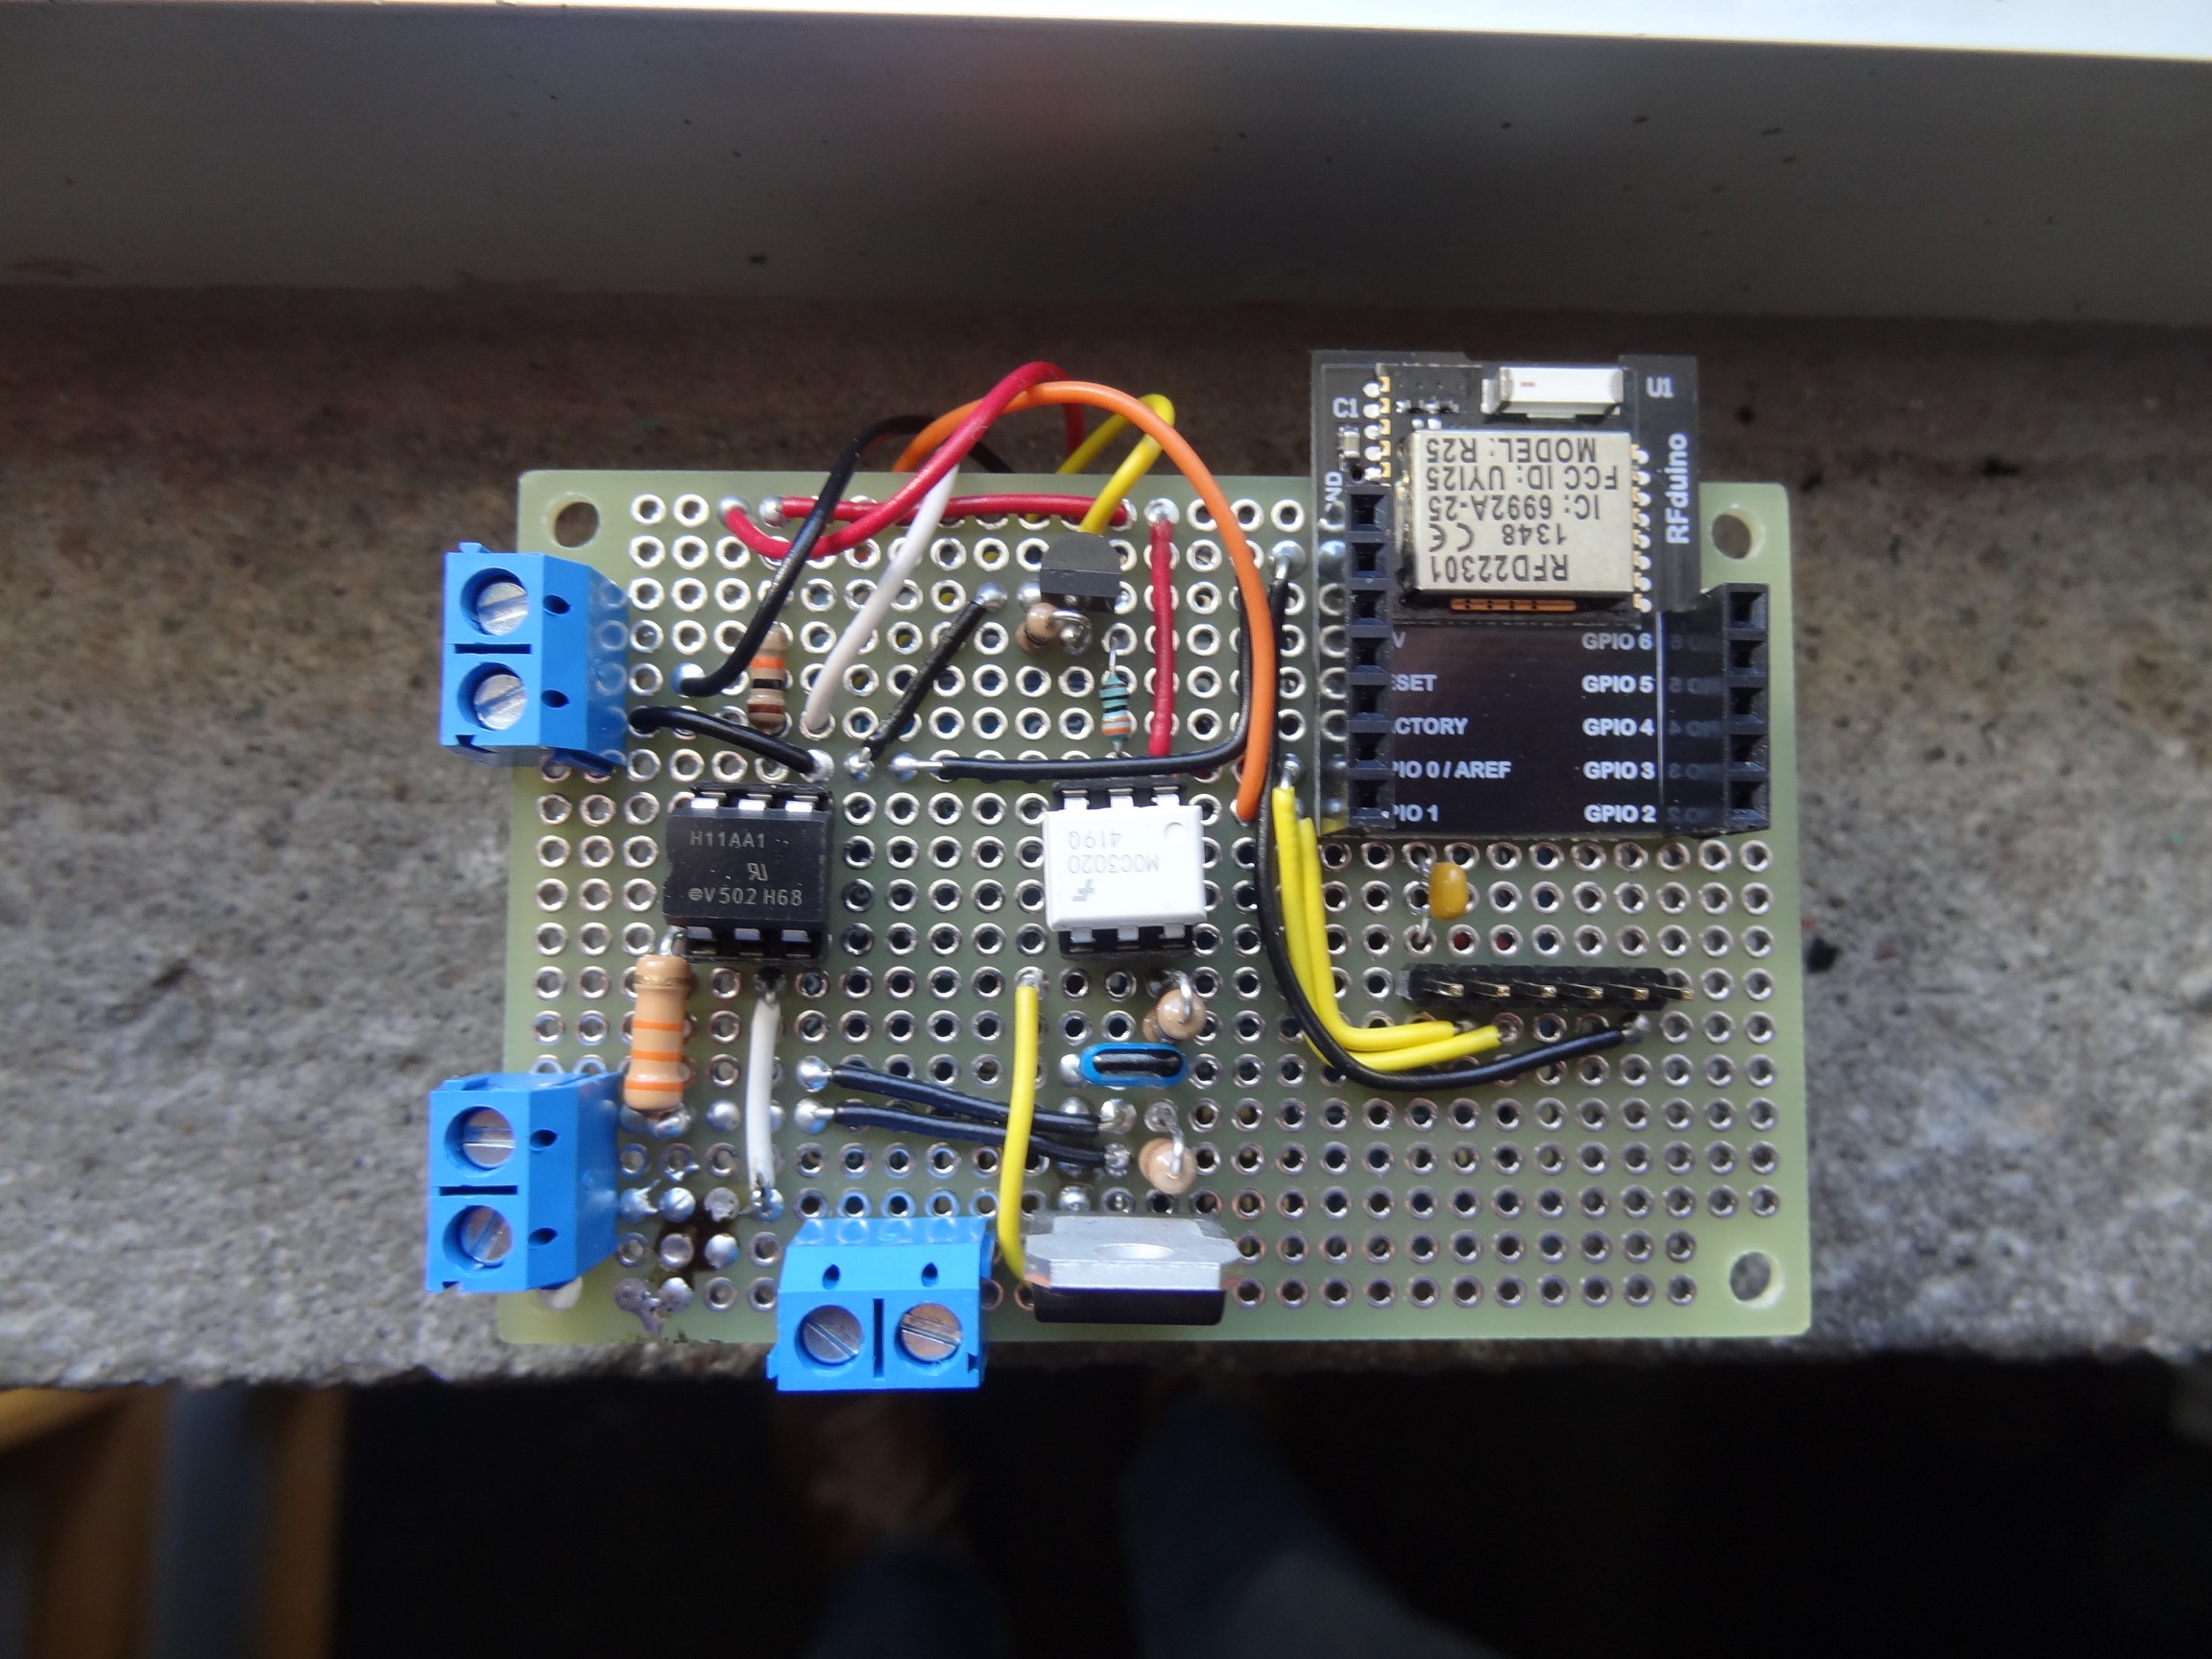
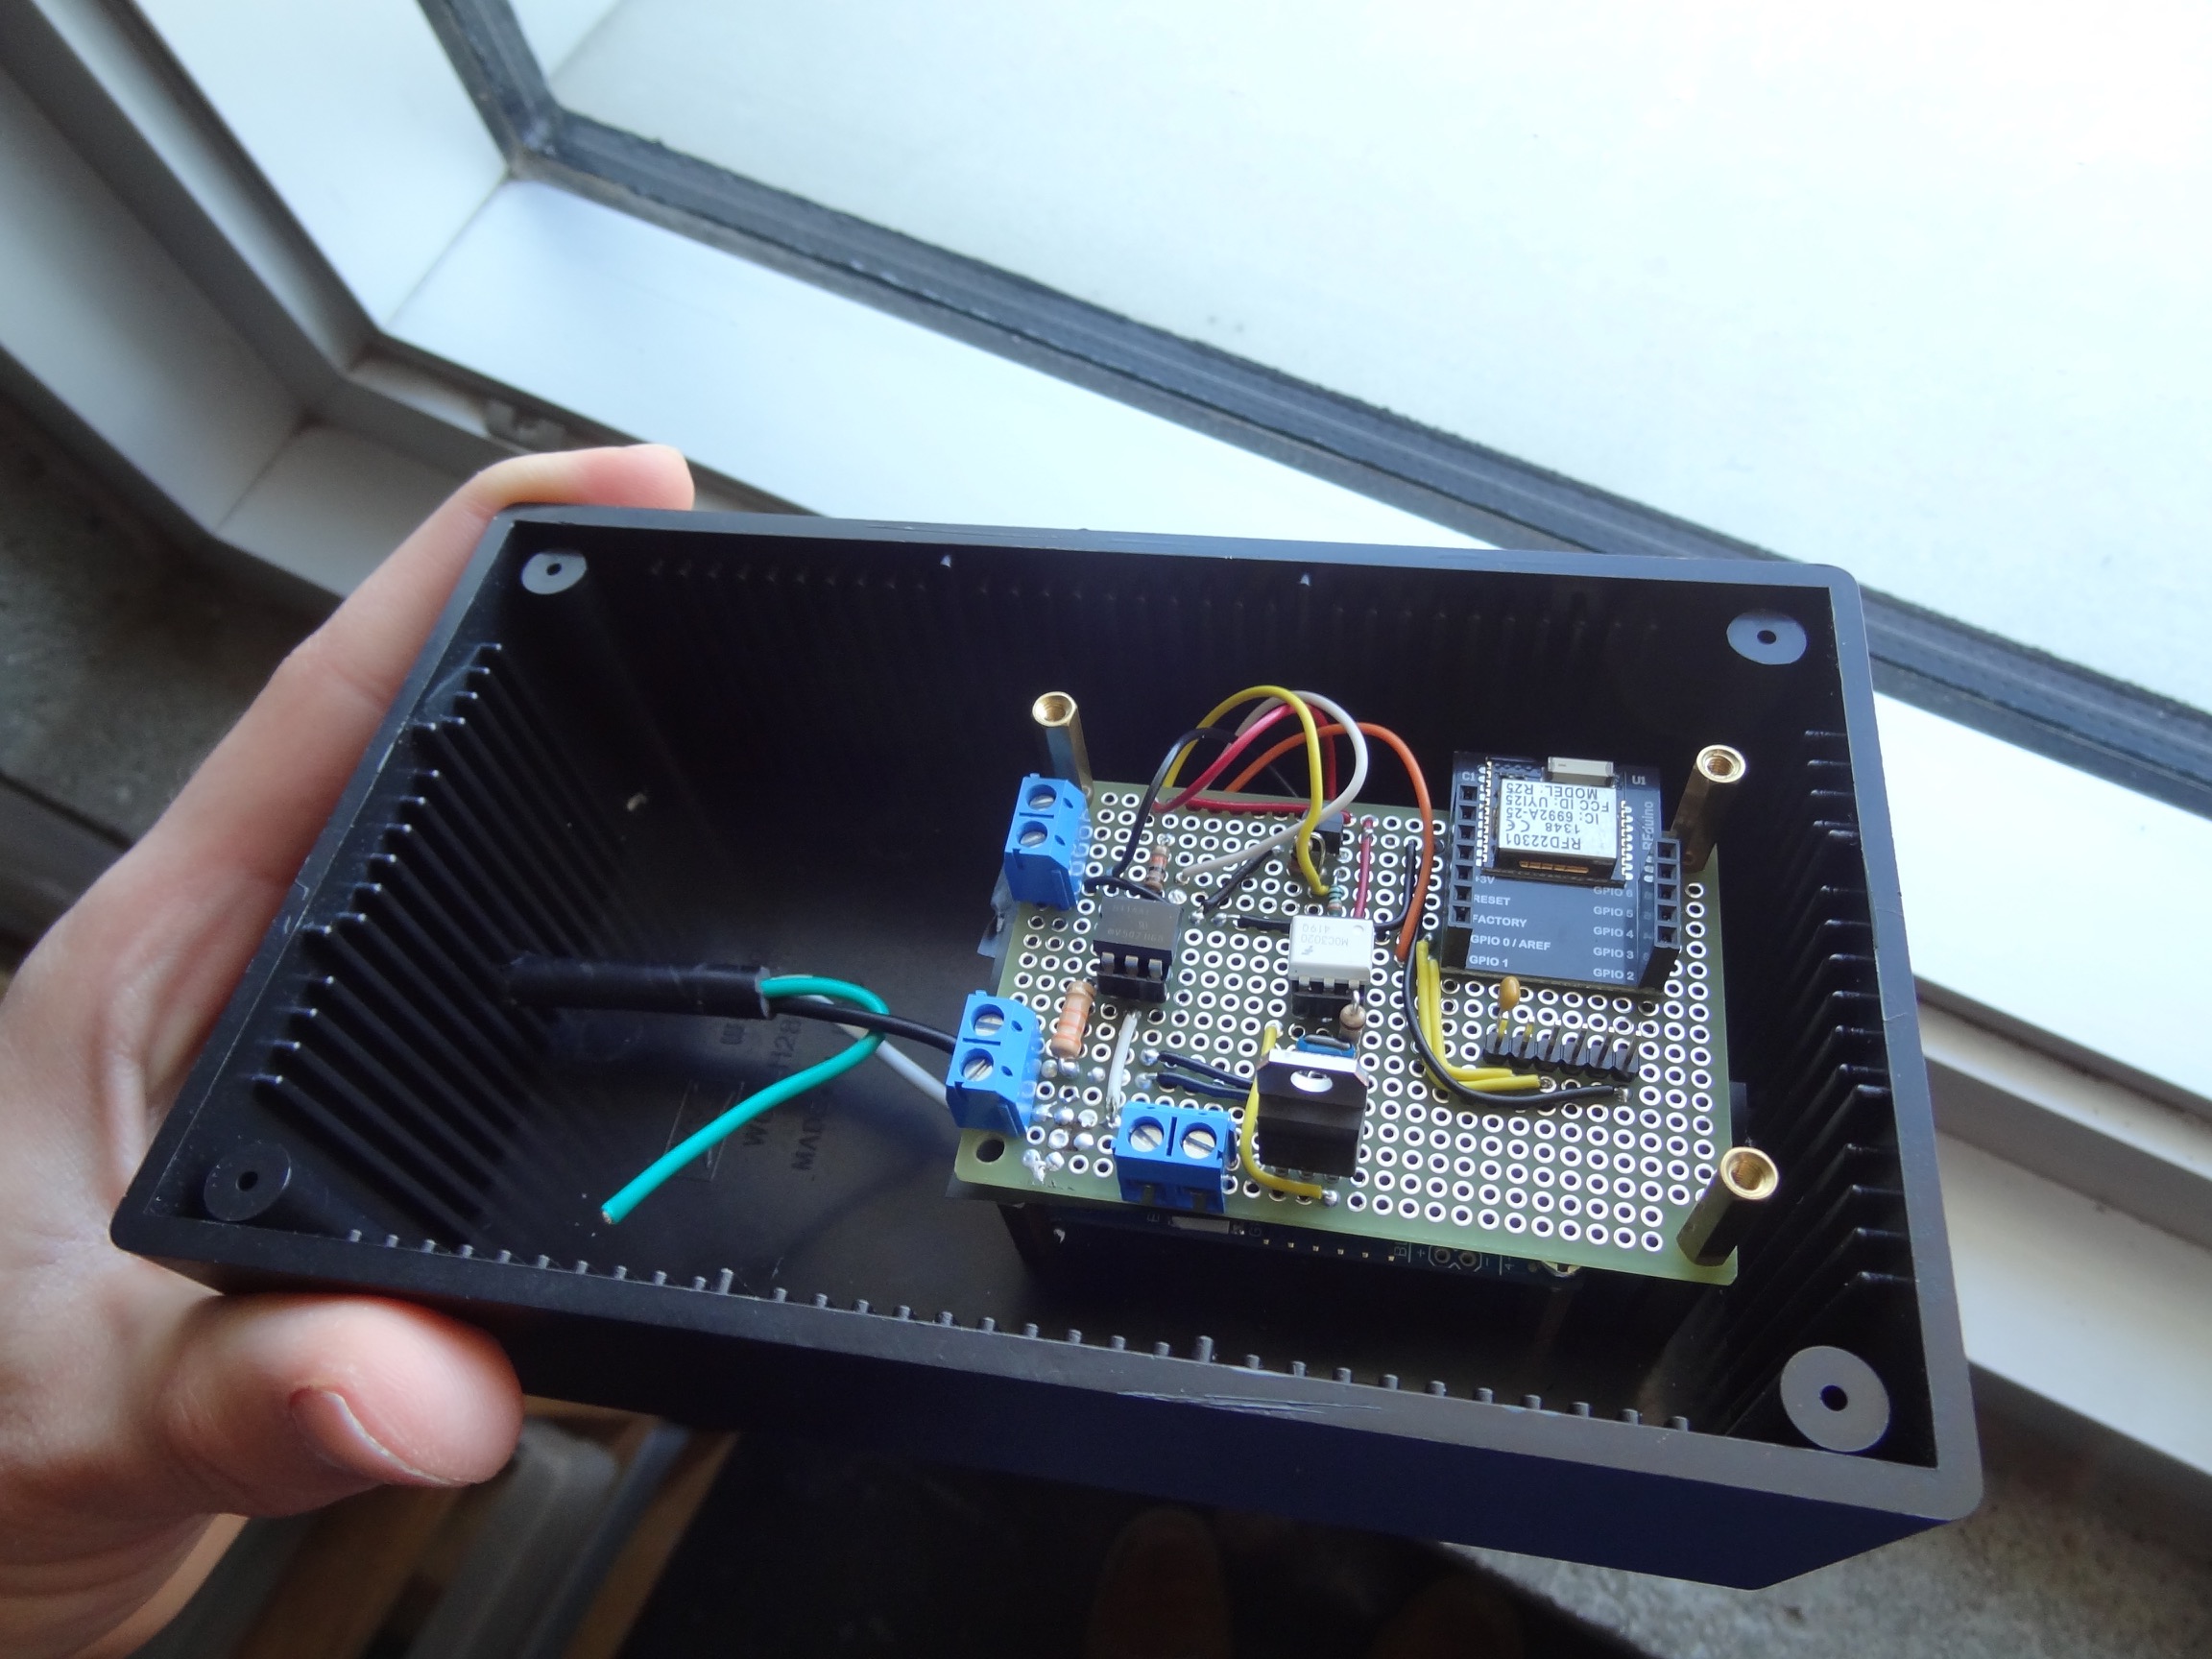
Prototype
The prototype of the WakeBright hardware was built with components I already had or those which were readily available online.
Some of the parts include:
- Arduino Pro 3.3V
- RFDuino
- 3.3v power supply
- project box
- power cable
- various phase-cutting components
The original plan was to use just the RFDuino without the additional Arduino Pro. The RFDuino is both a Bluetooth Low Energy module and an Arduino compatible microcontroller. However, I found that the interrupts generated by the RFDuino's Bluetooth stack were interfering with the timing of my phase-cutting firmware. So in the end I decided to just use the RFDuino as a serial Bluetooth module. The Arduino Pro runs the phase cutting firmware.
Because of this setup, if you look at the RFDuino firmware you will see that it is mostly just receiving data over Bluetooth and sending it over serial to the Arduino Pro. However, it is also doing one other thing. Every second the RFDuino sends a byte to the iPhone. This is what allows the WakeBright app to wake-up when in the background and execute any code it needs to. Without this the app would only work if it was in the foreground all of the time. Essentially this 1Hz ping is the WakeBright hardware "asking" for new data. More about the app later.
Prototype's firmware:
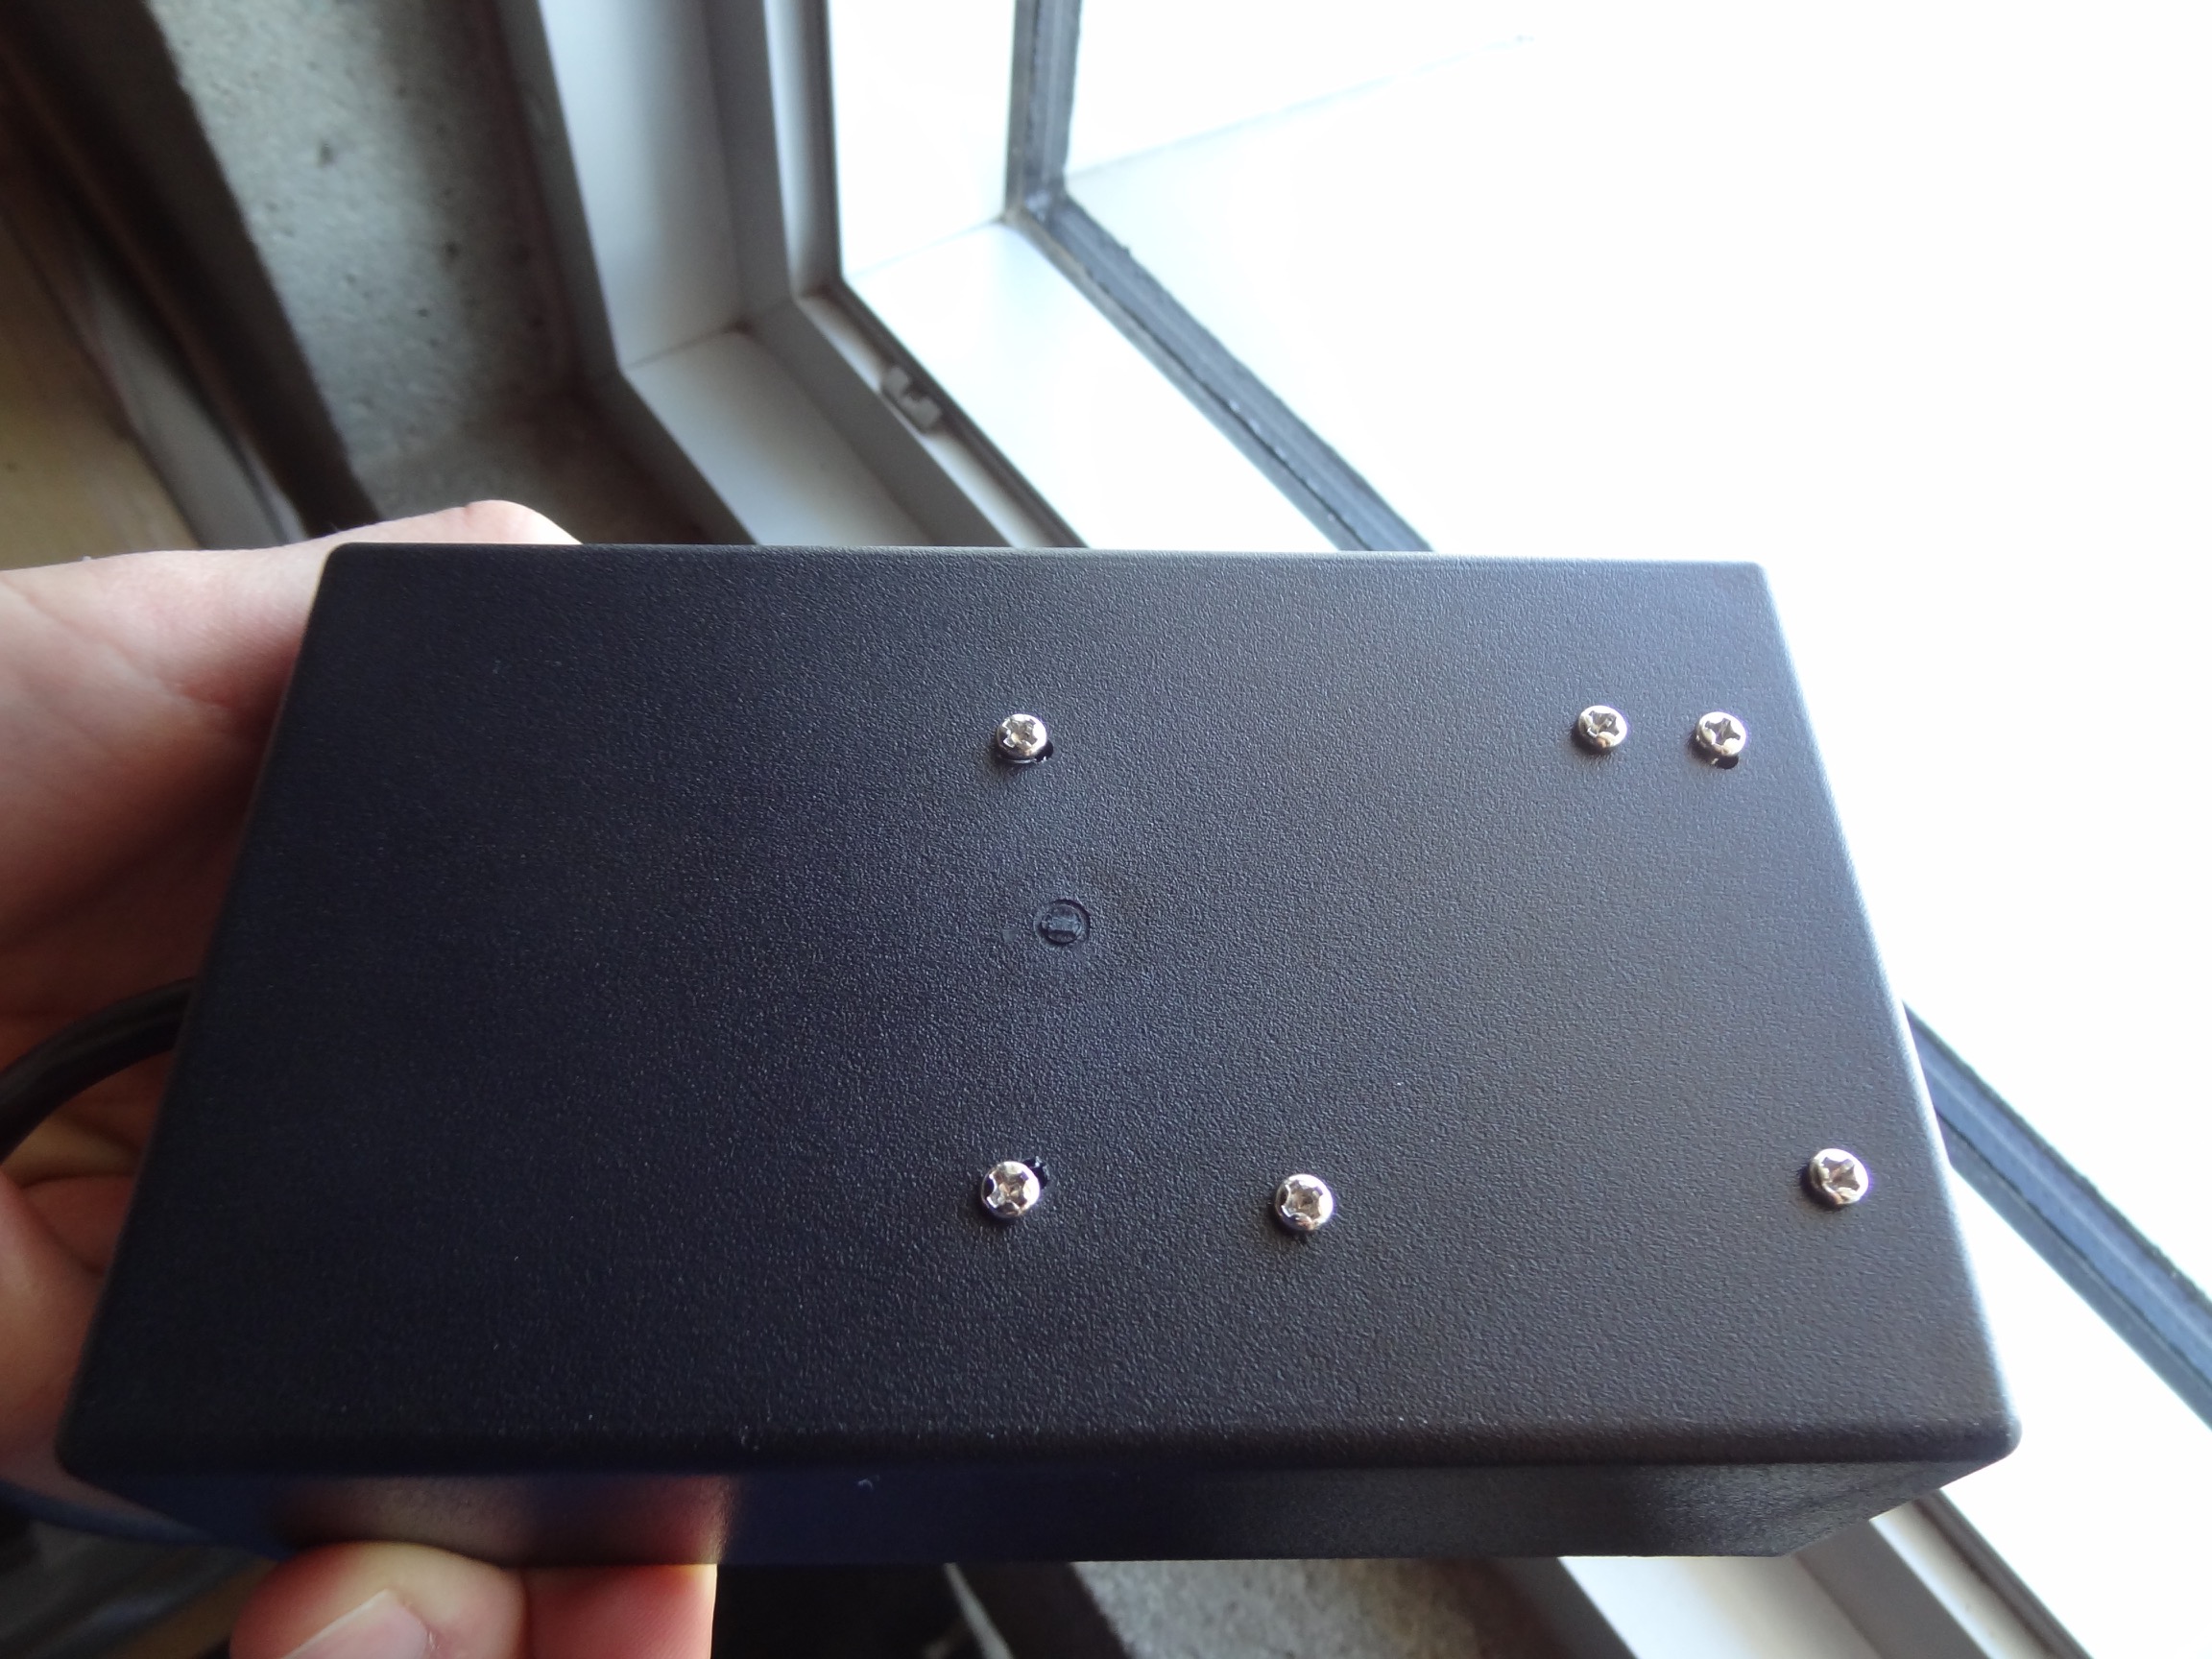
Prototype Photos
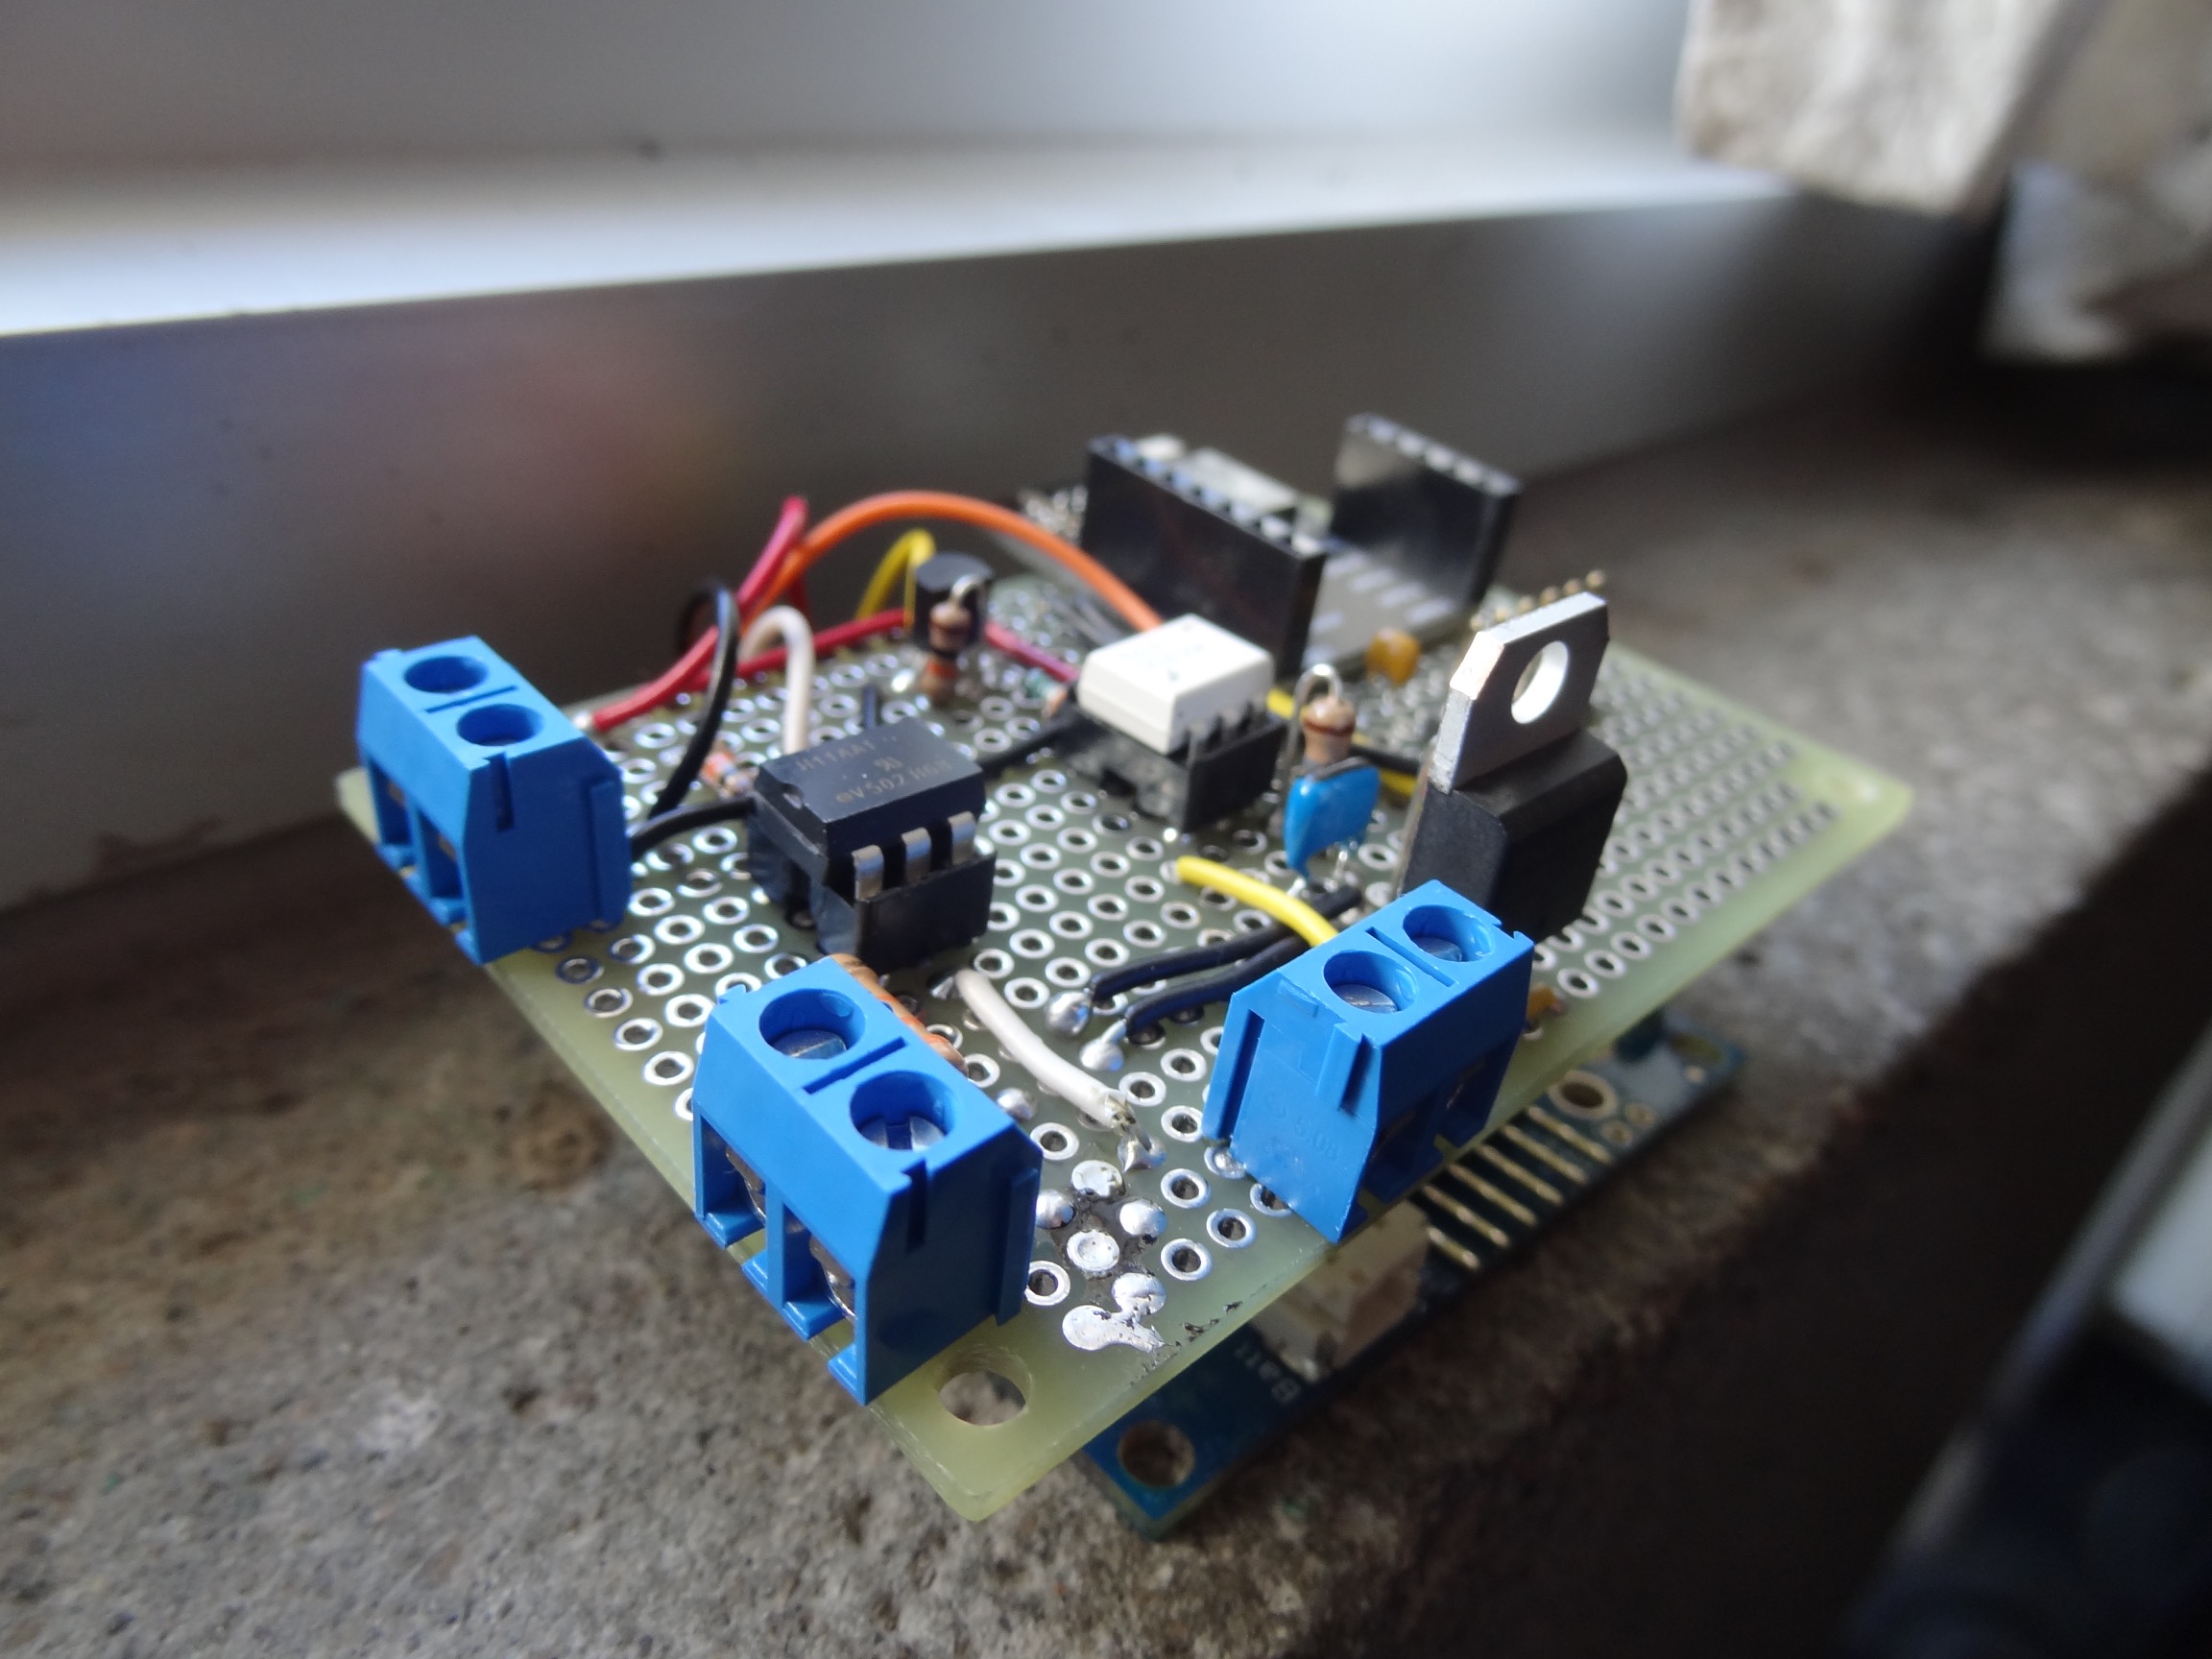


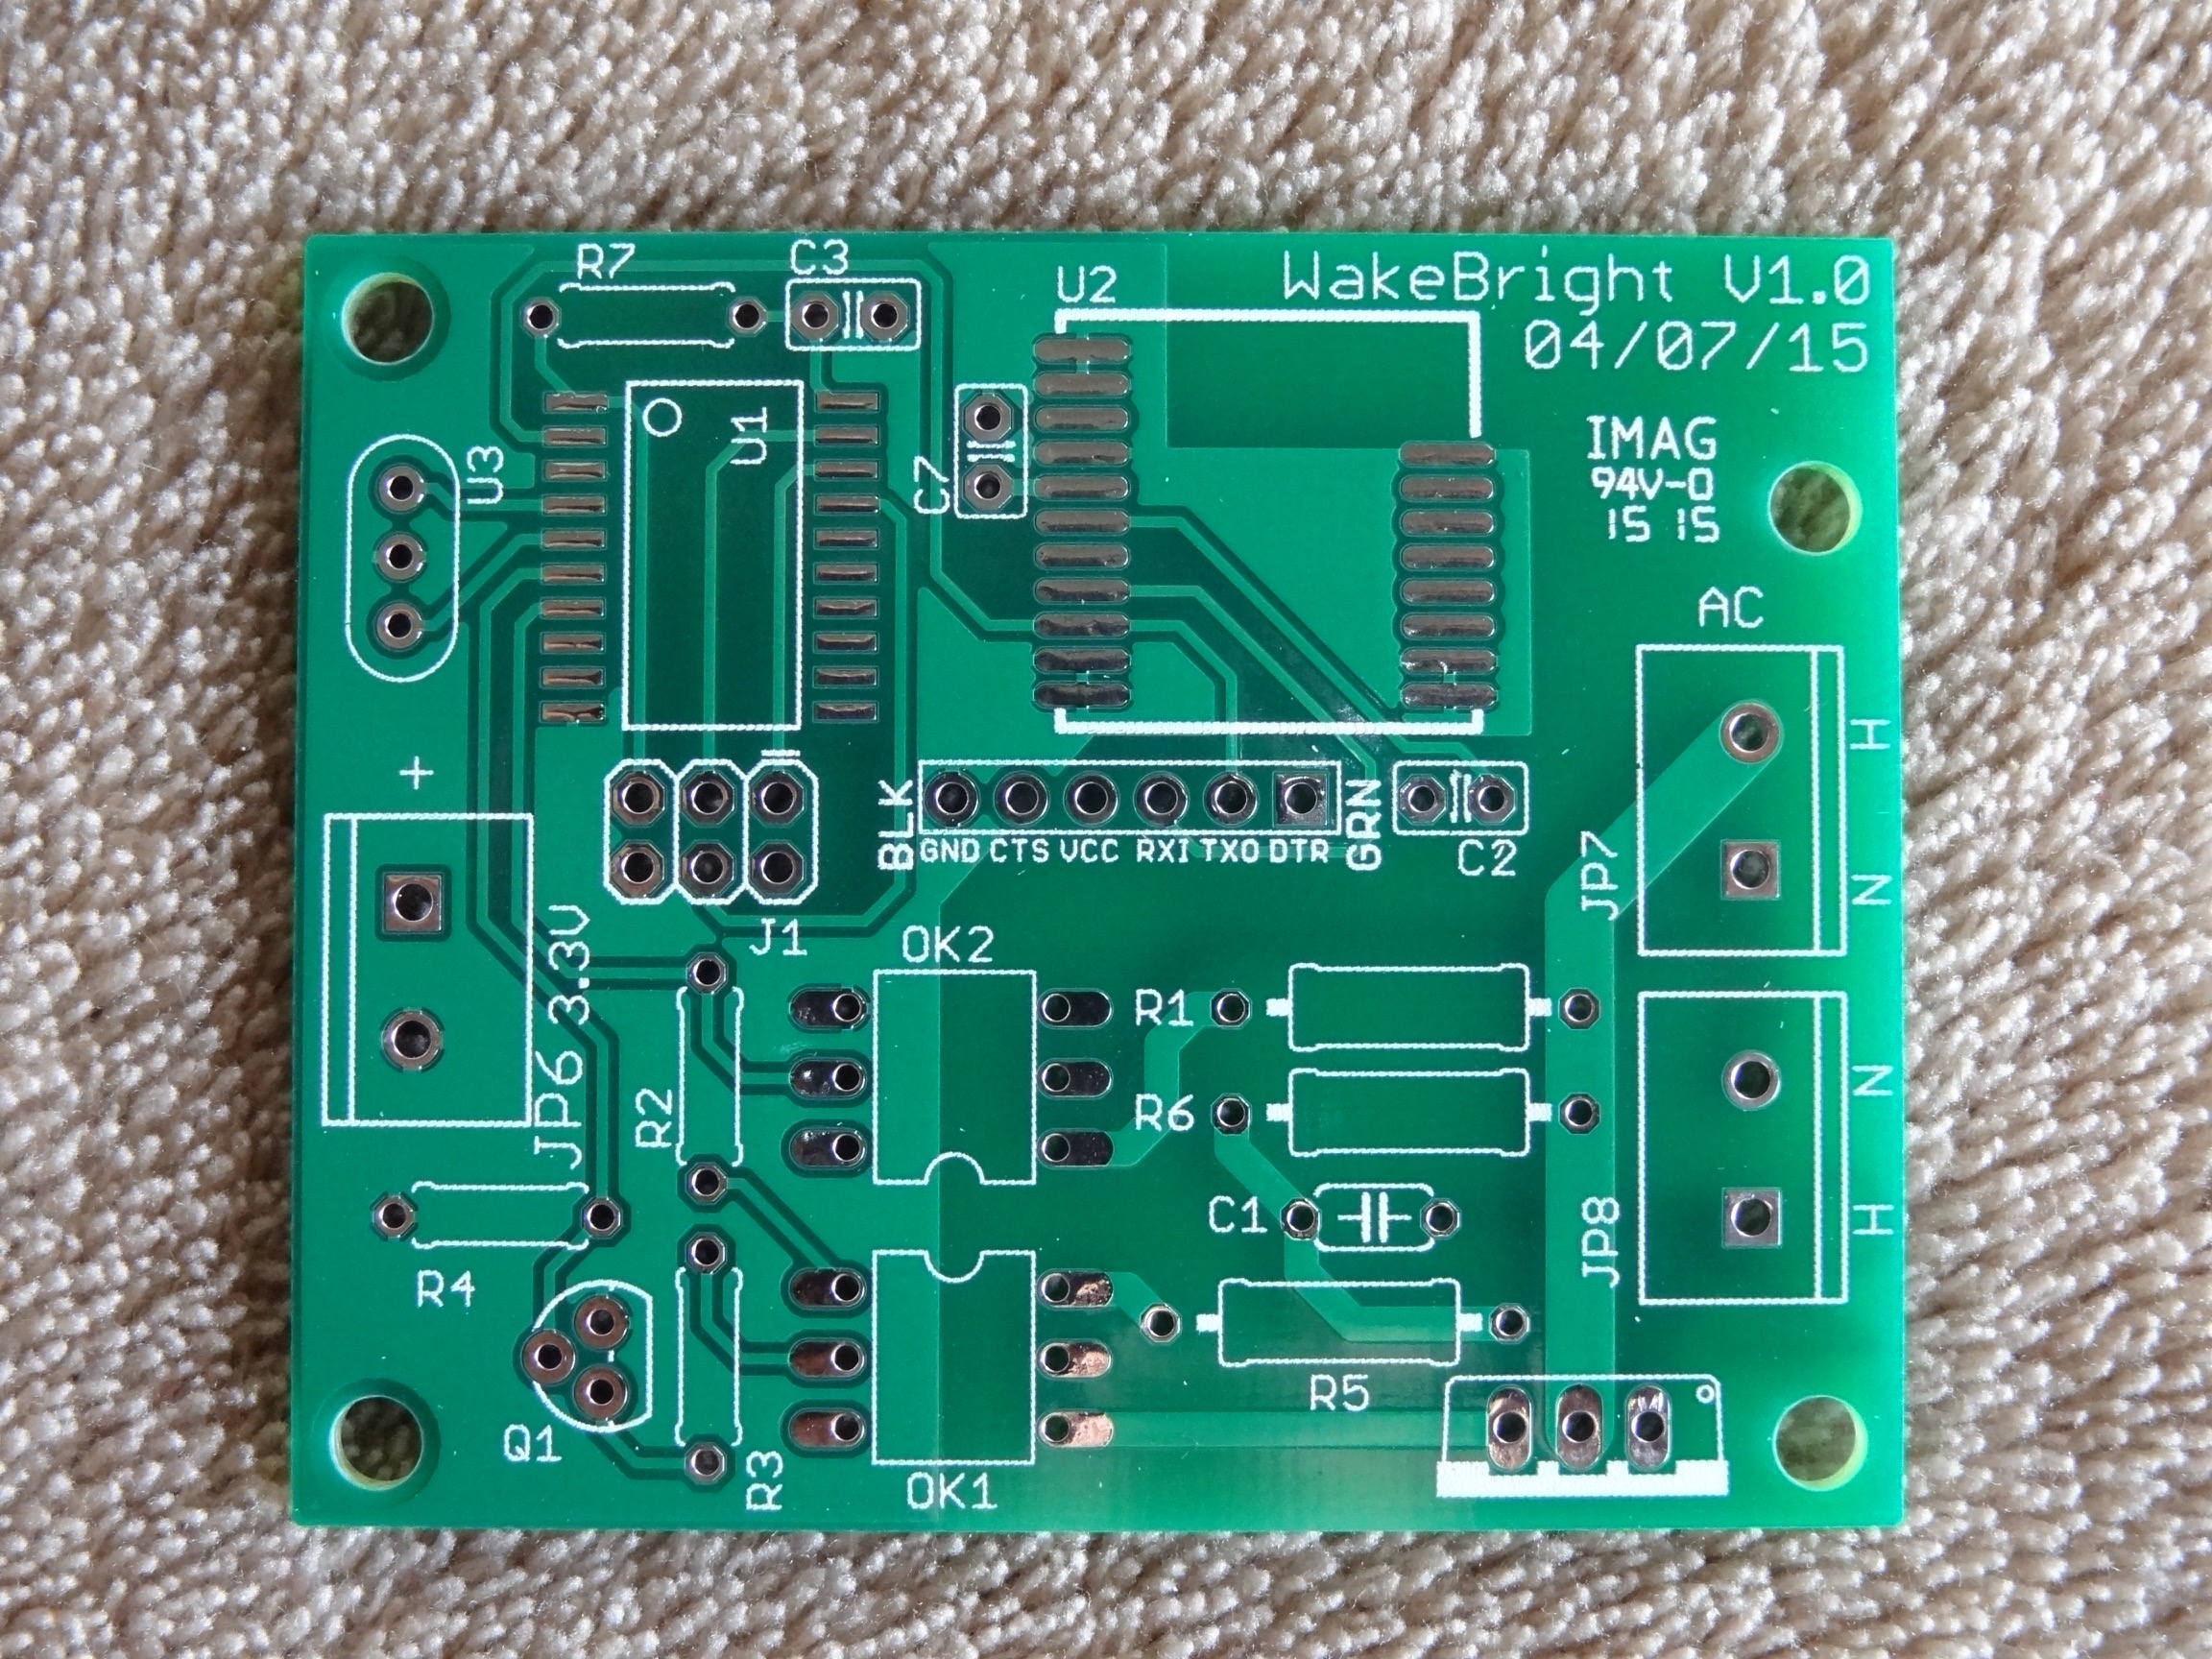
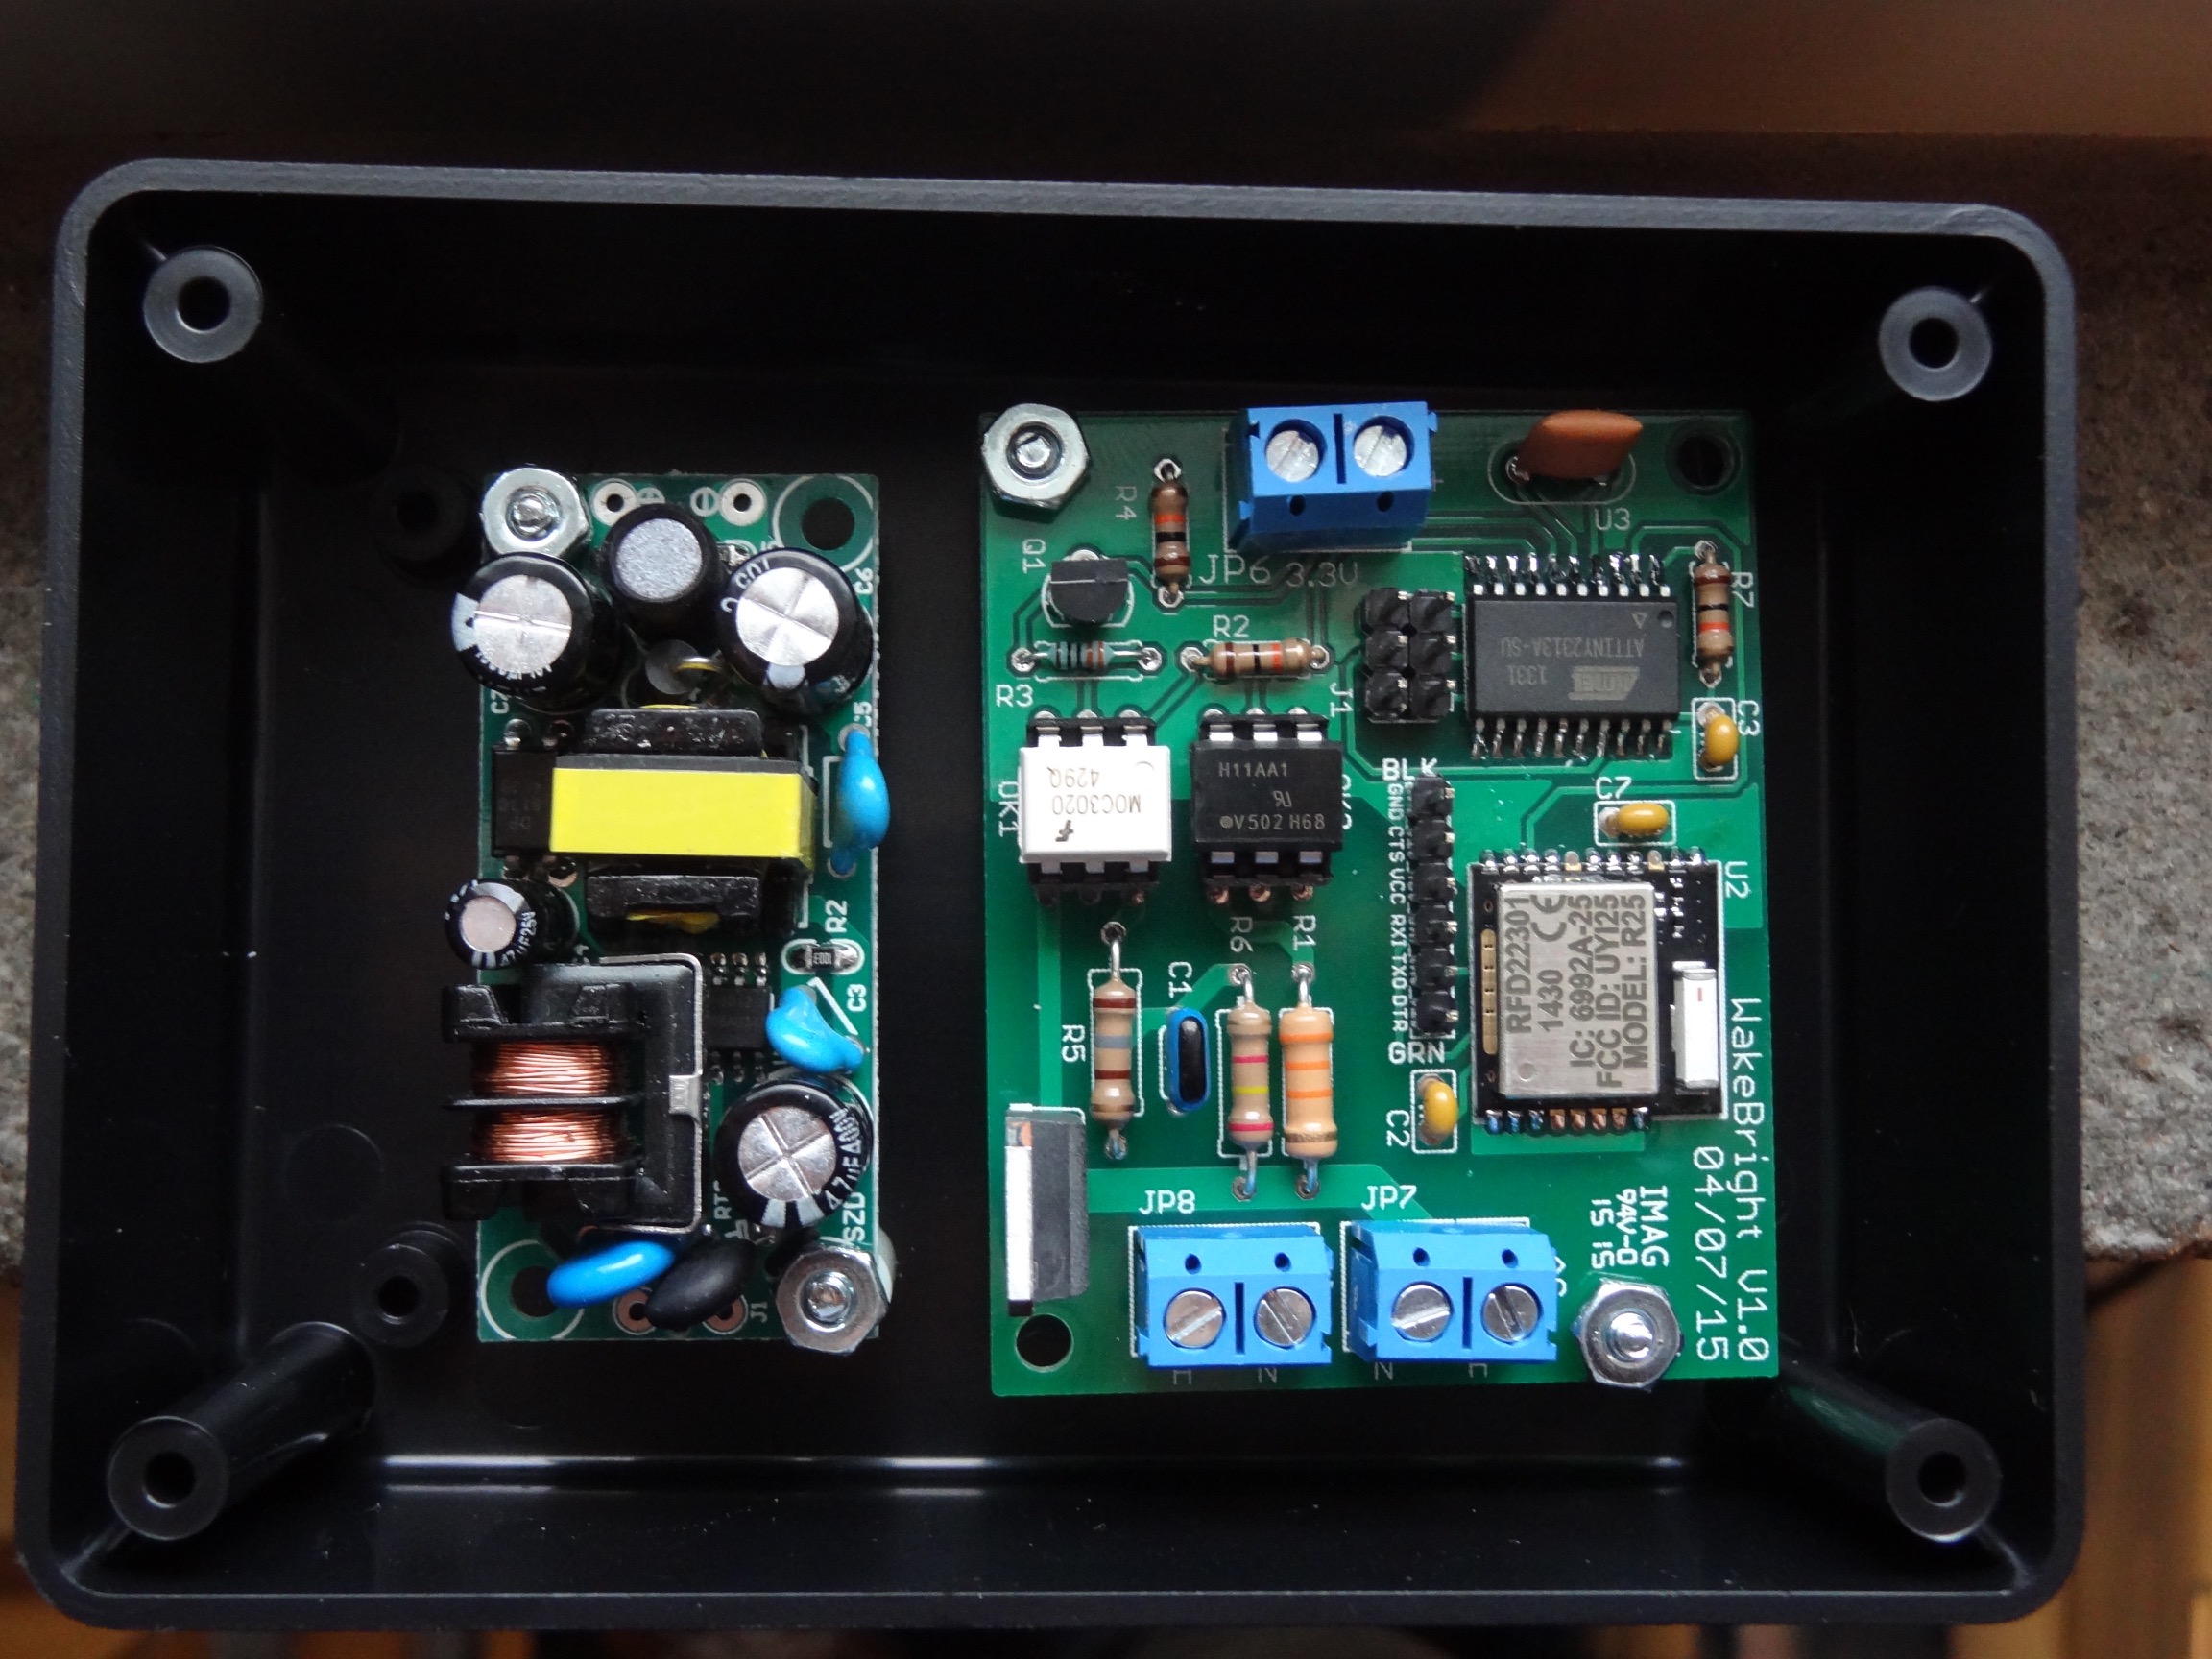
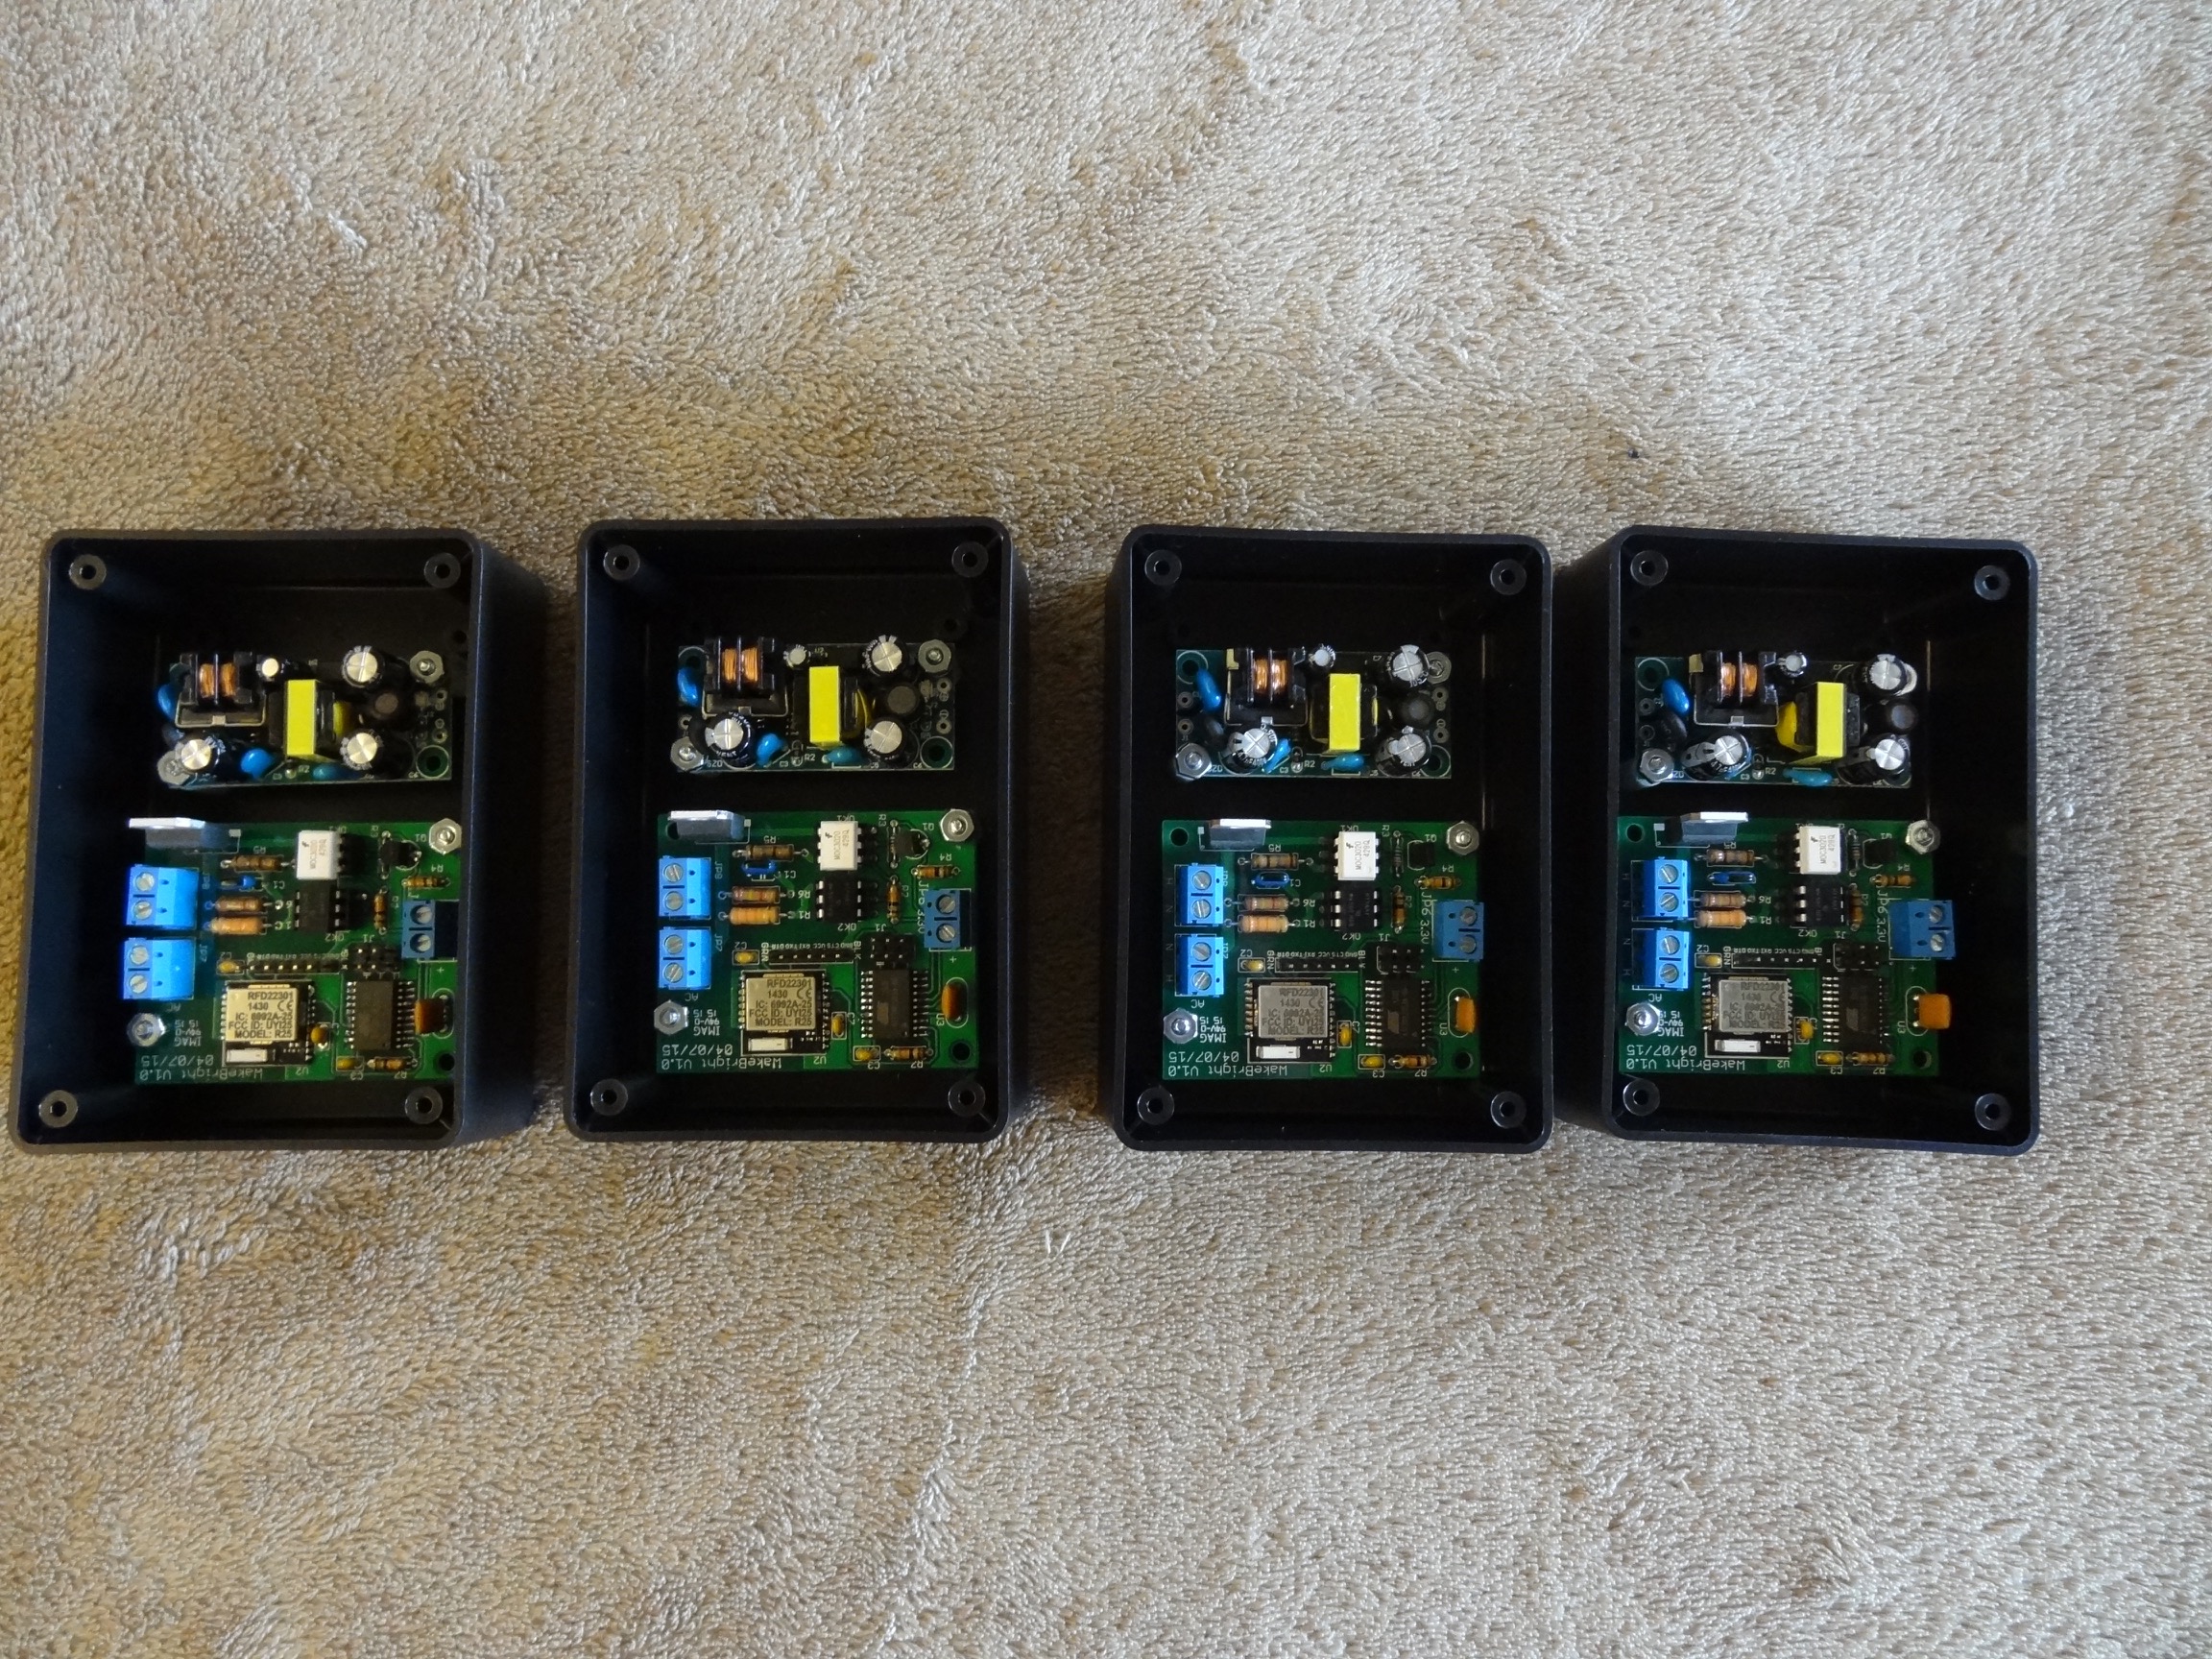
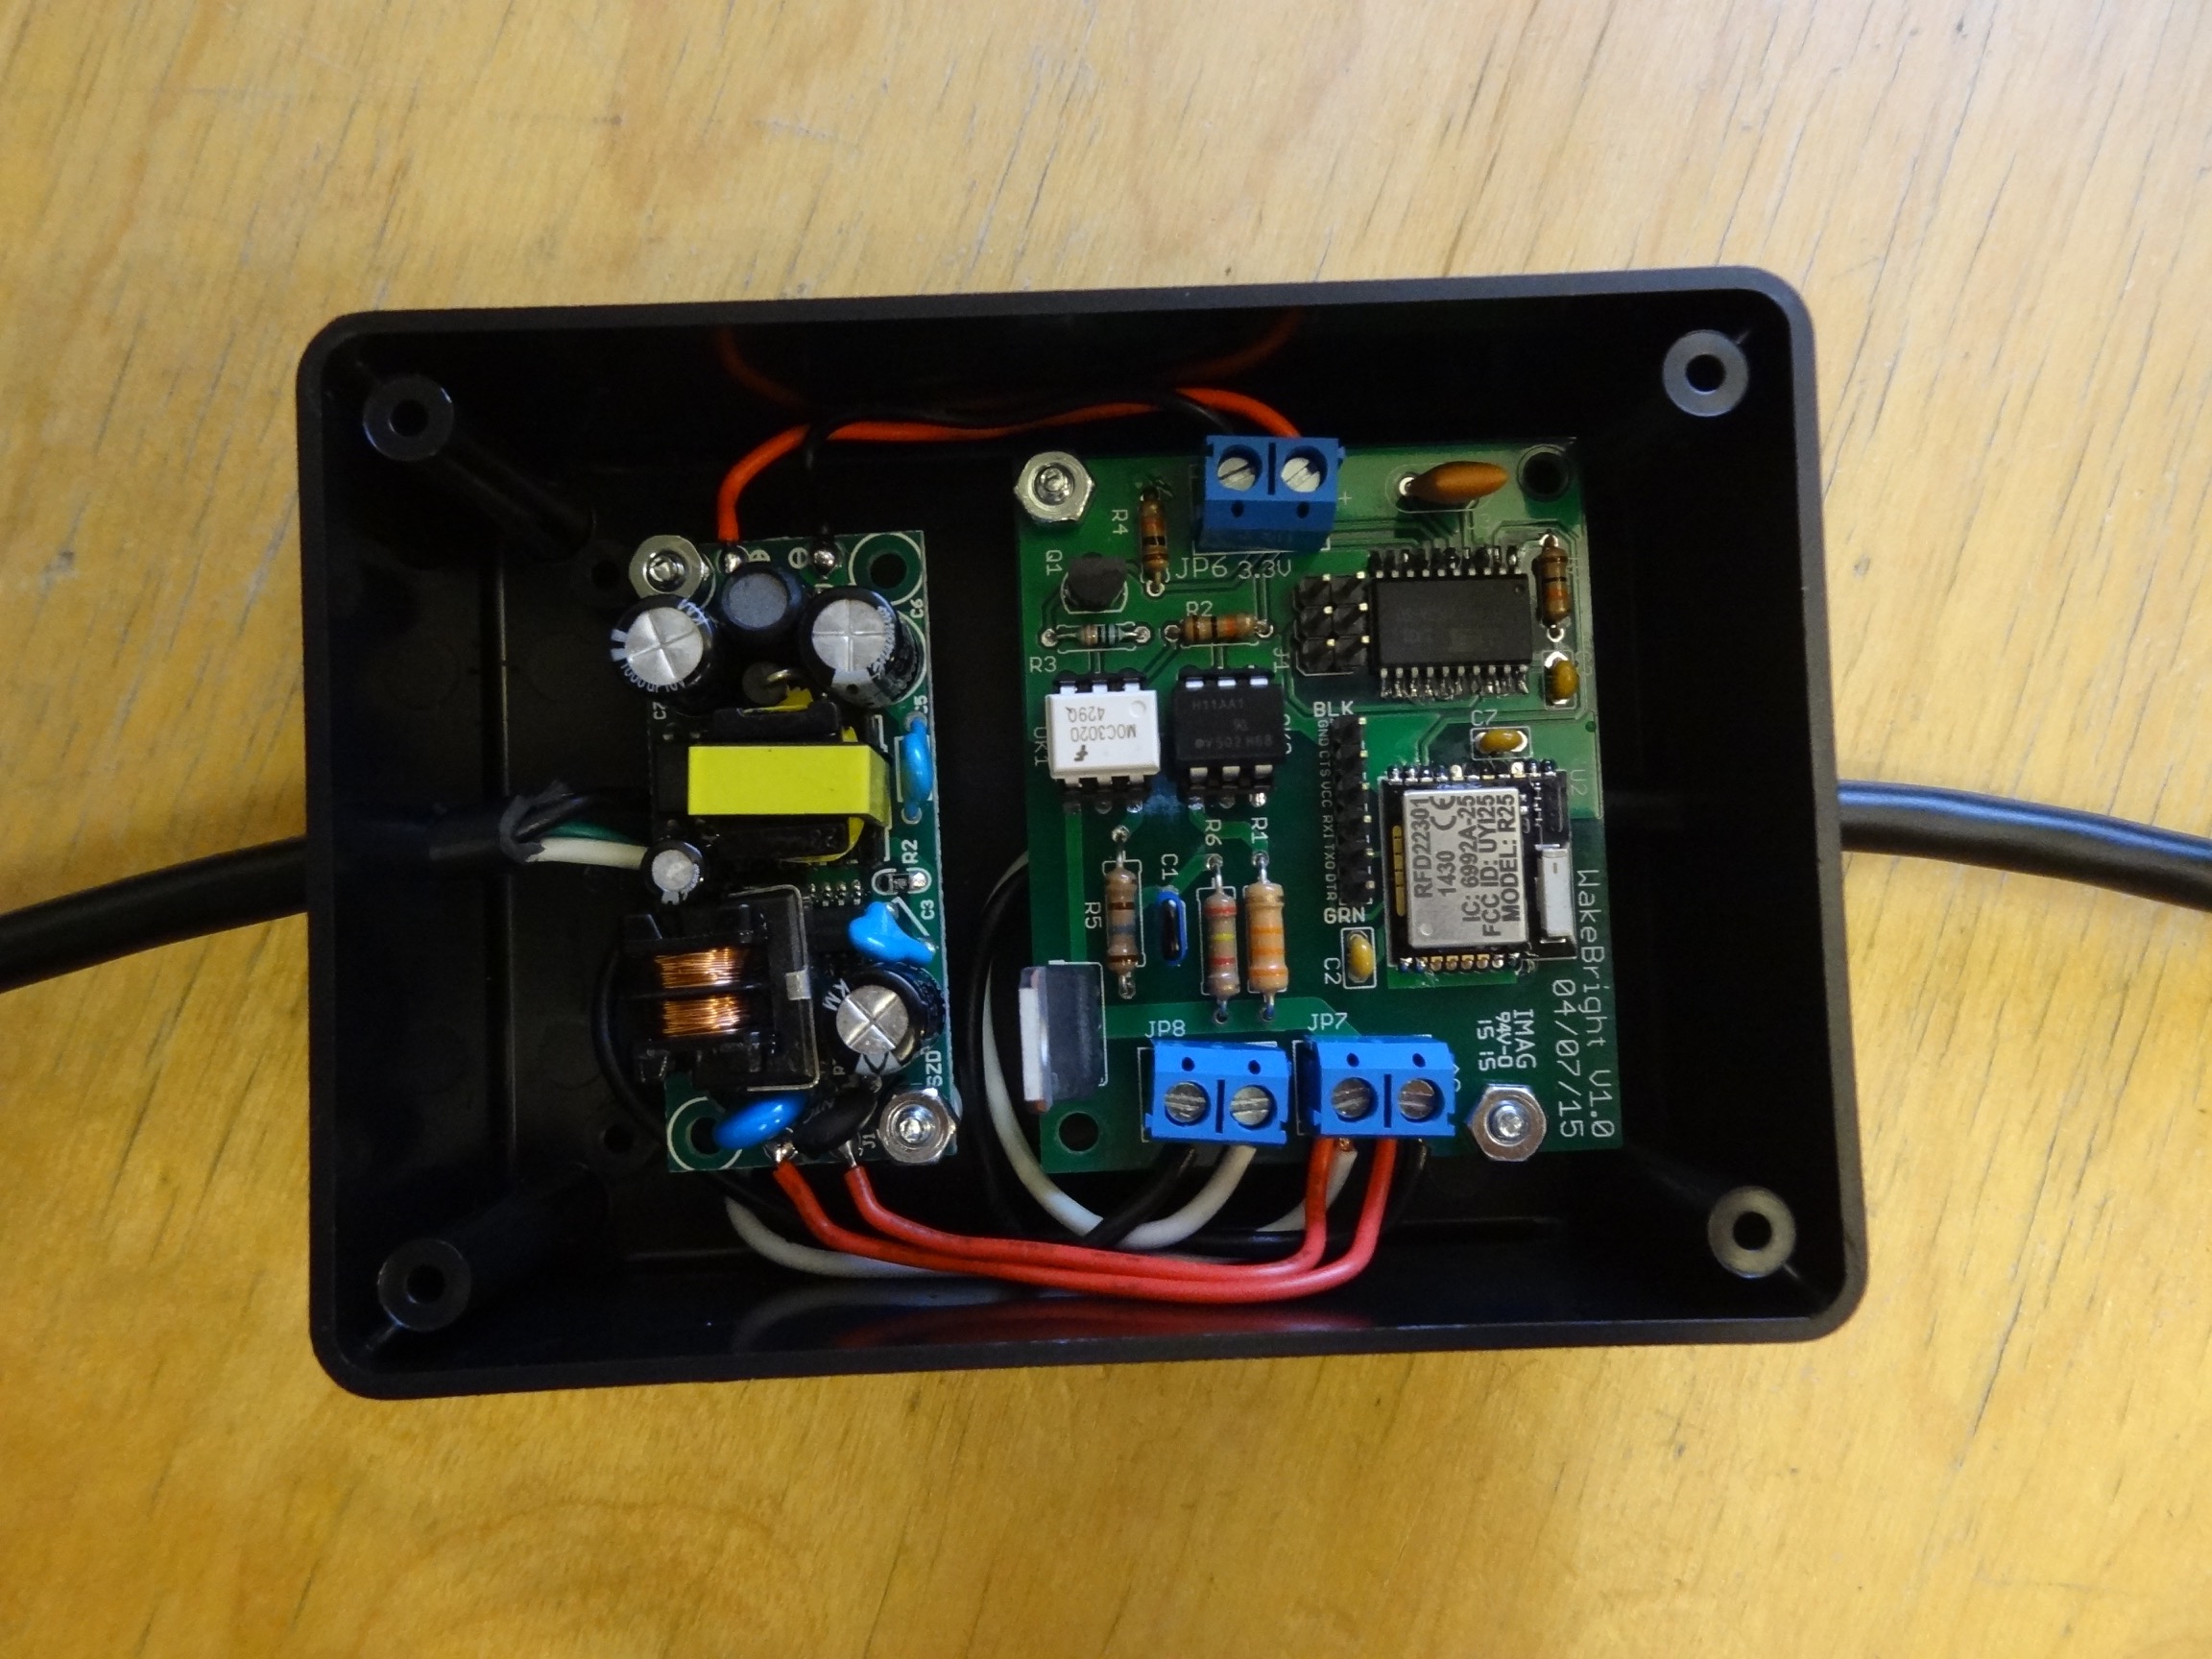
WakeBright Final Version
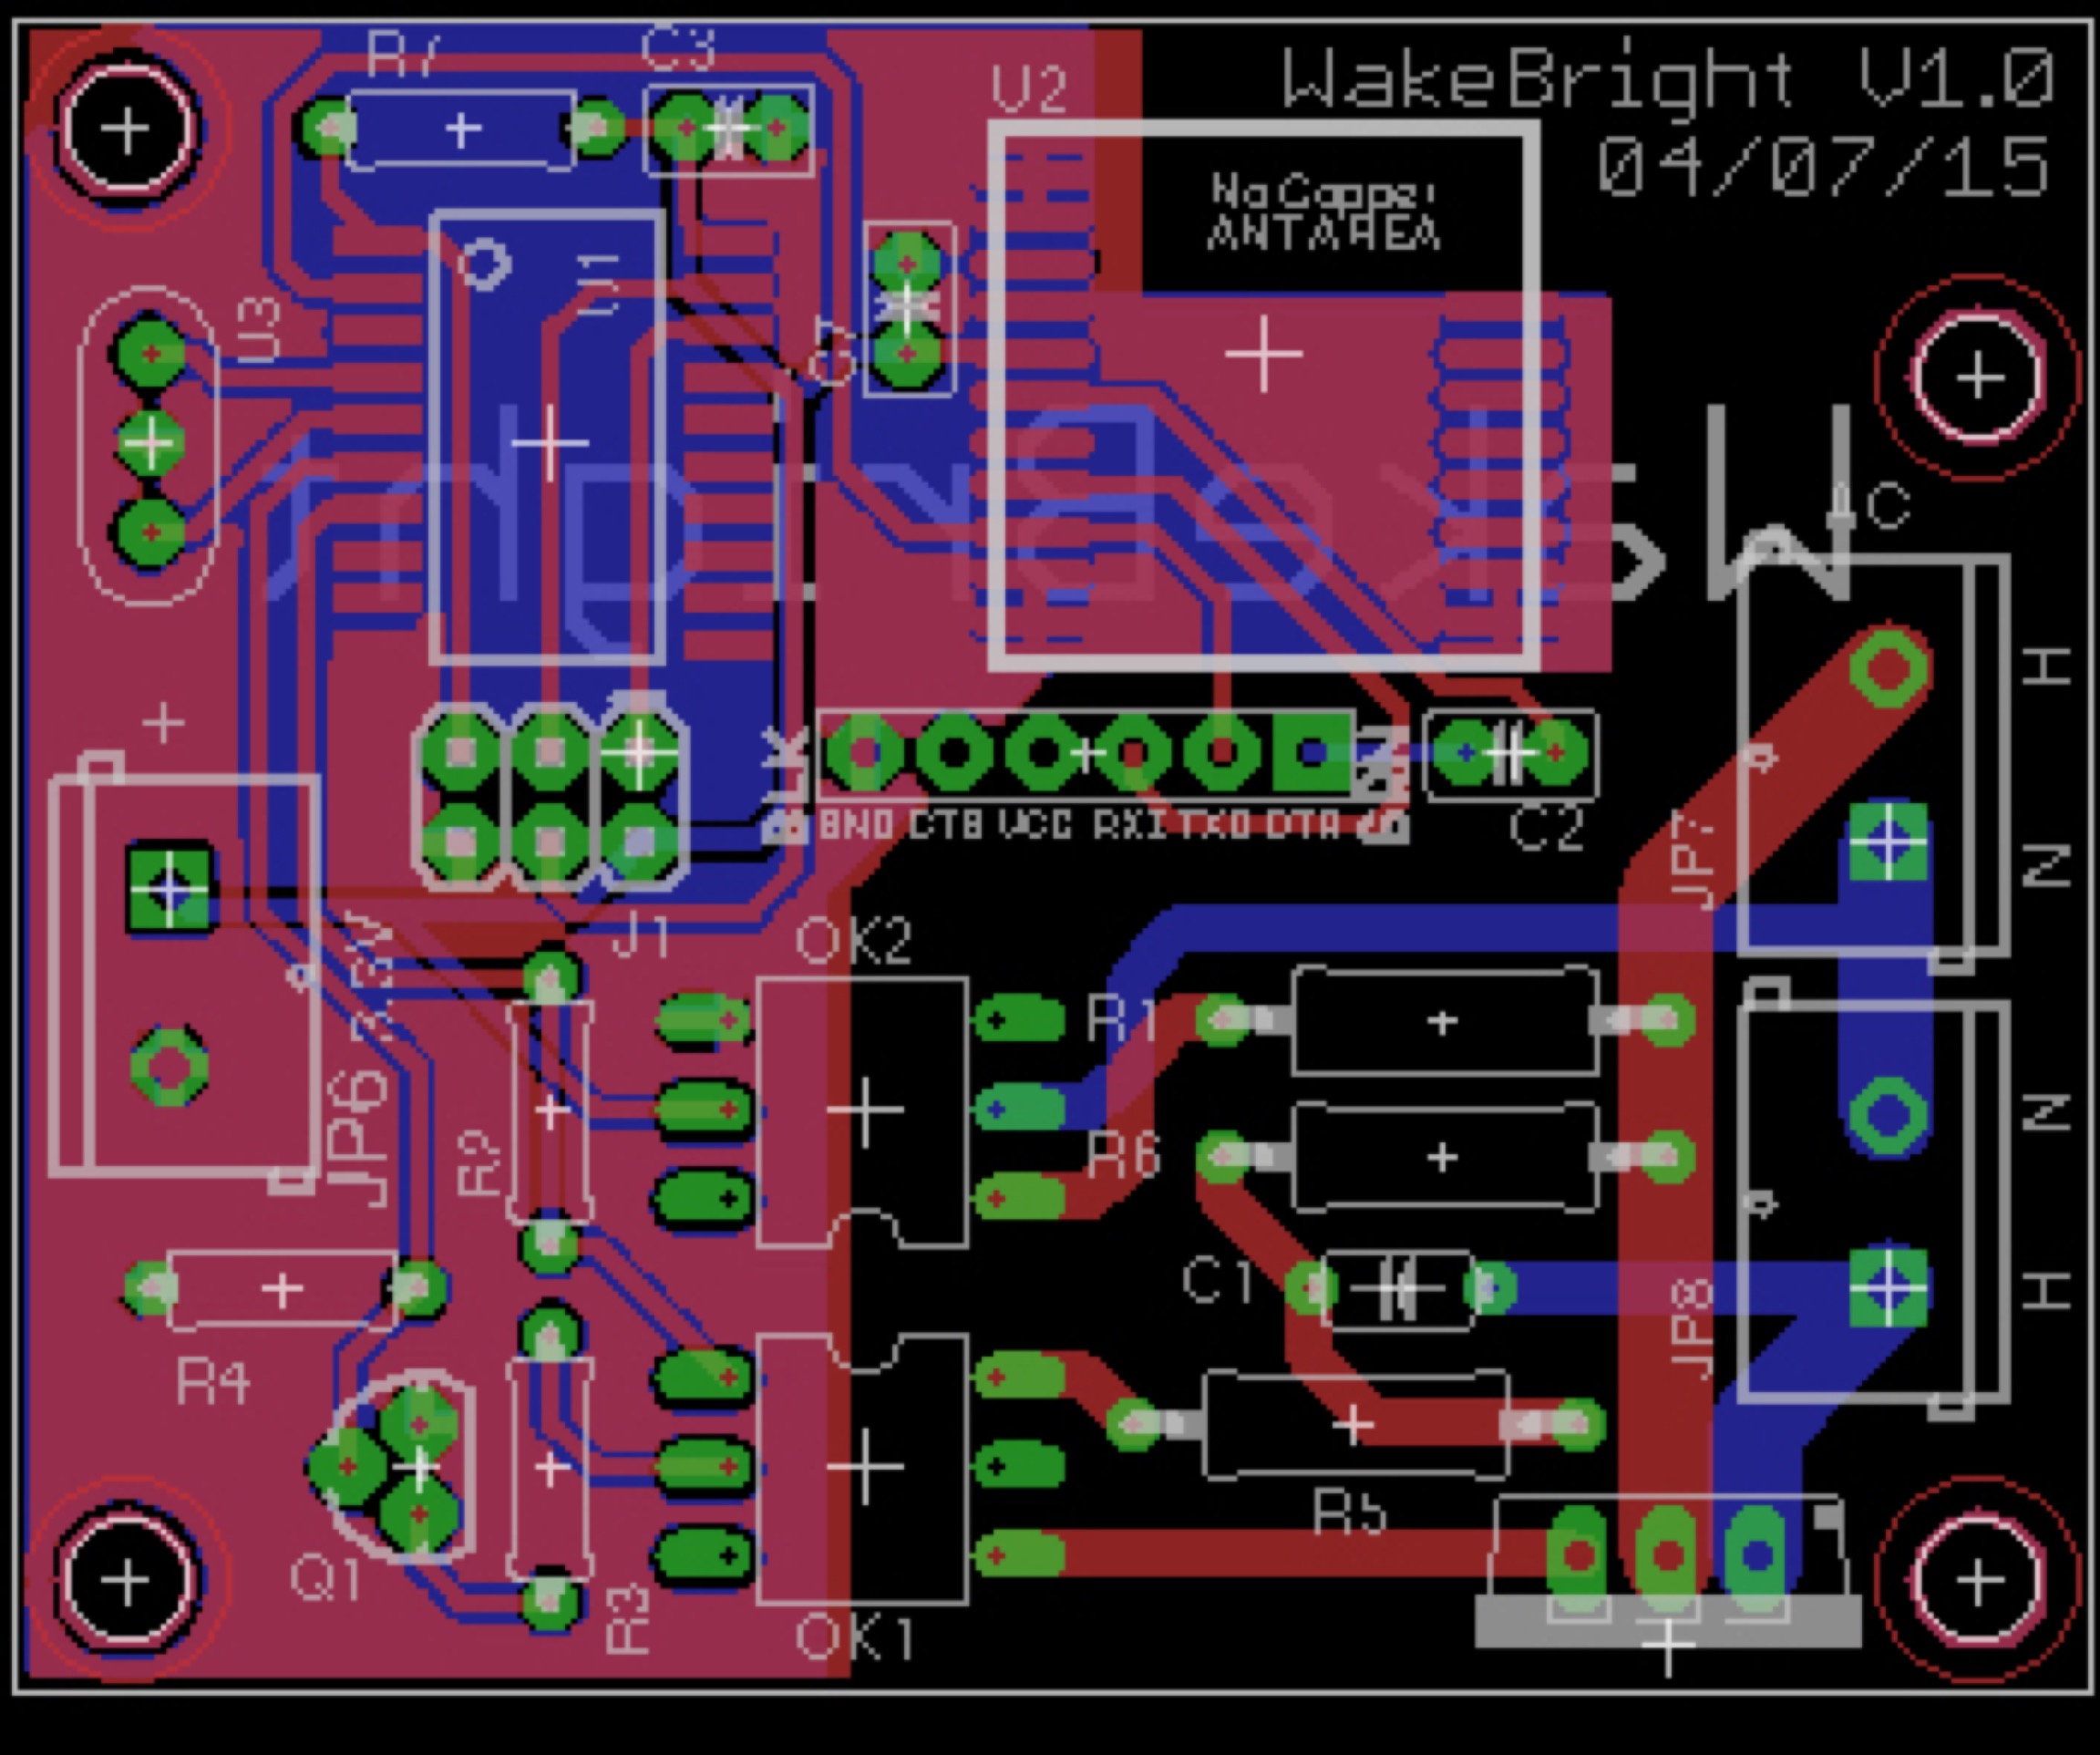
After making the prototype I needed to make five more WakeBrights. To make the assembly process quicker and cleaner I designed a custom PCB. I had the PCBs made at Accutrace - 10 PCBs for $30 total. The circuit is very similar to that of the prototype. However the Arduino Pro in the prototype has been replaced with an Atmel Attiny2313A running at 8MHz. The final version still uses a RFDuino as the Bluetooth link and the same phase-cutting circuitry. I used a new power-supply in this version that does not require any hacking like in the prototype. With the new design the final version is much smaller than the prototype.
Design files:
Parts list:
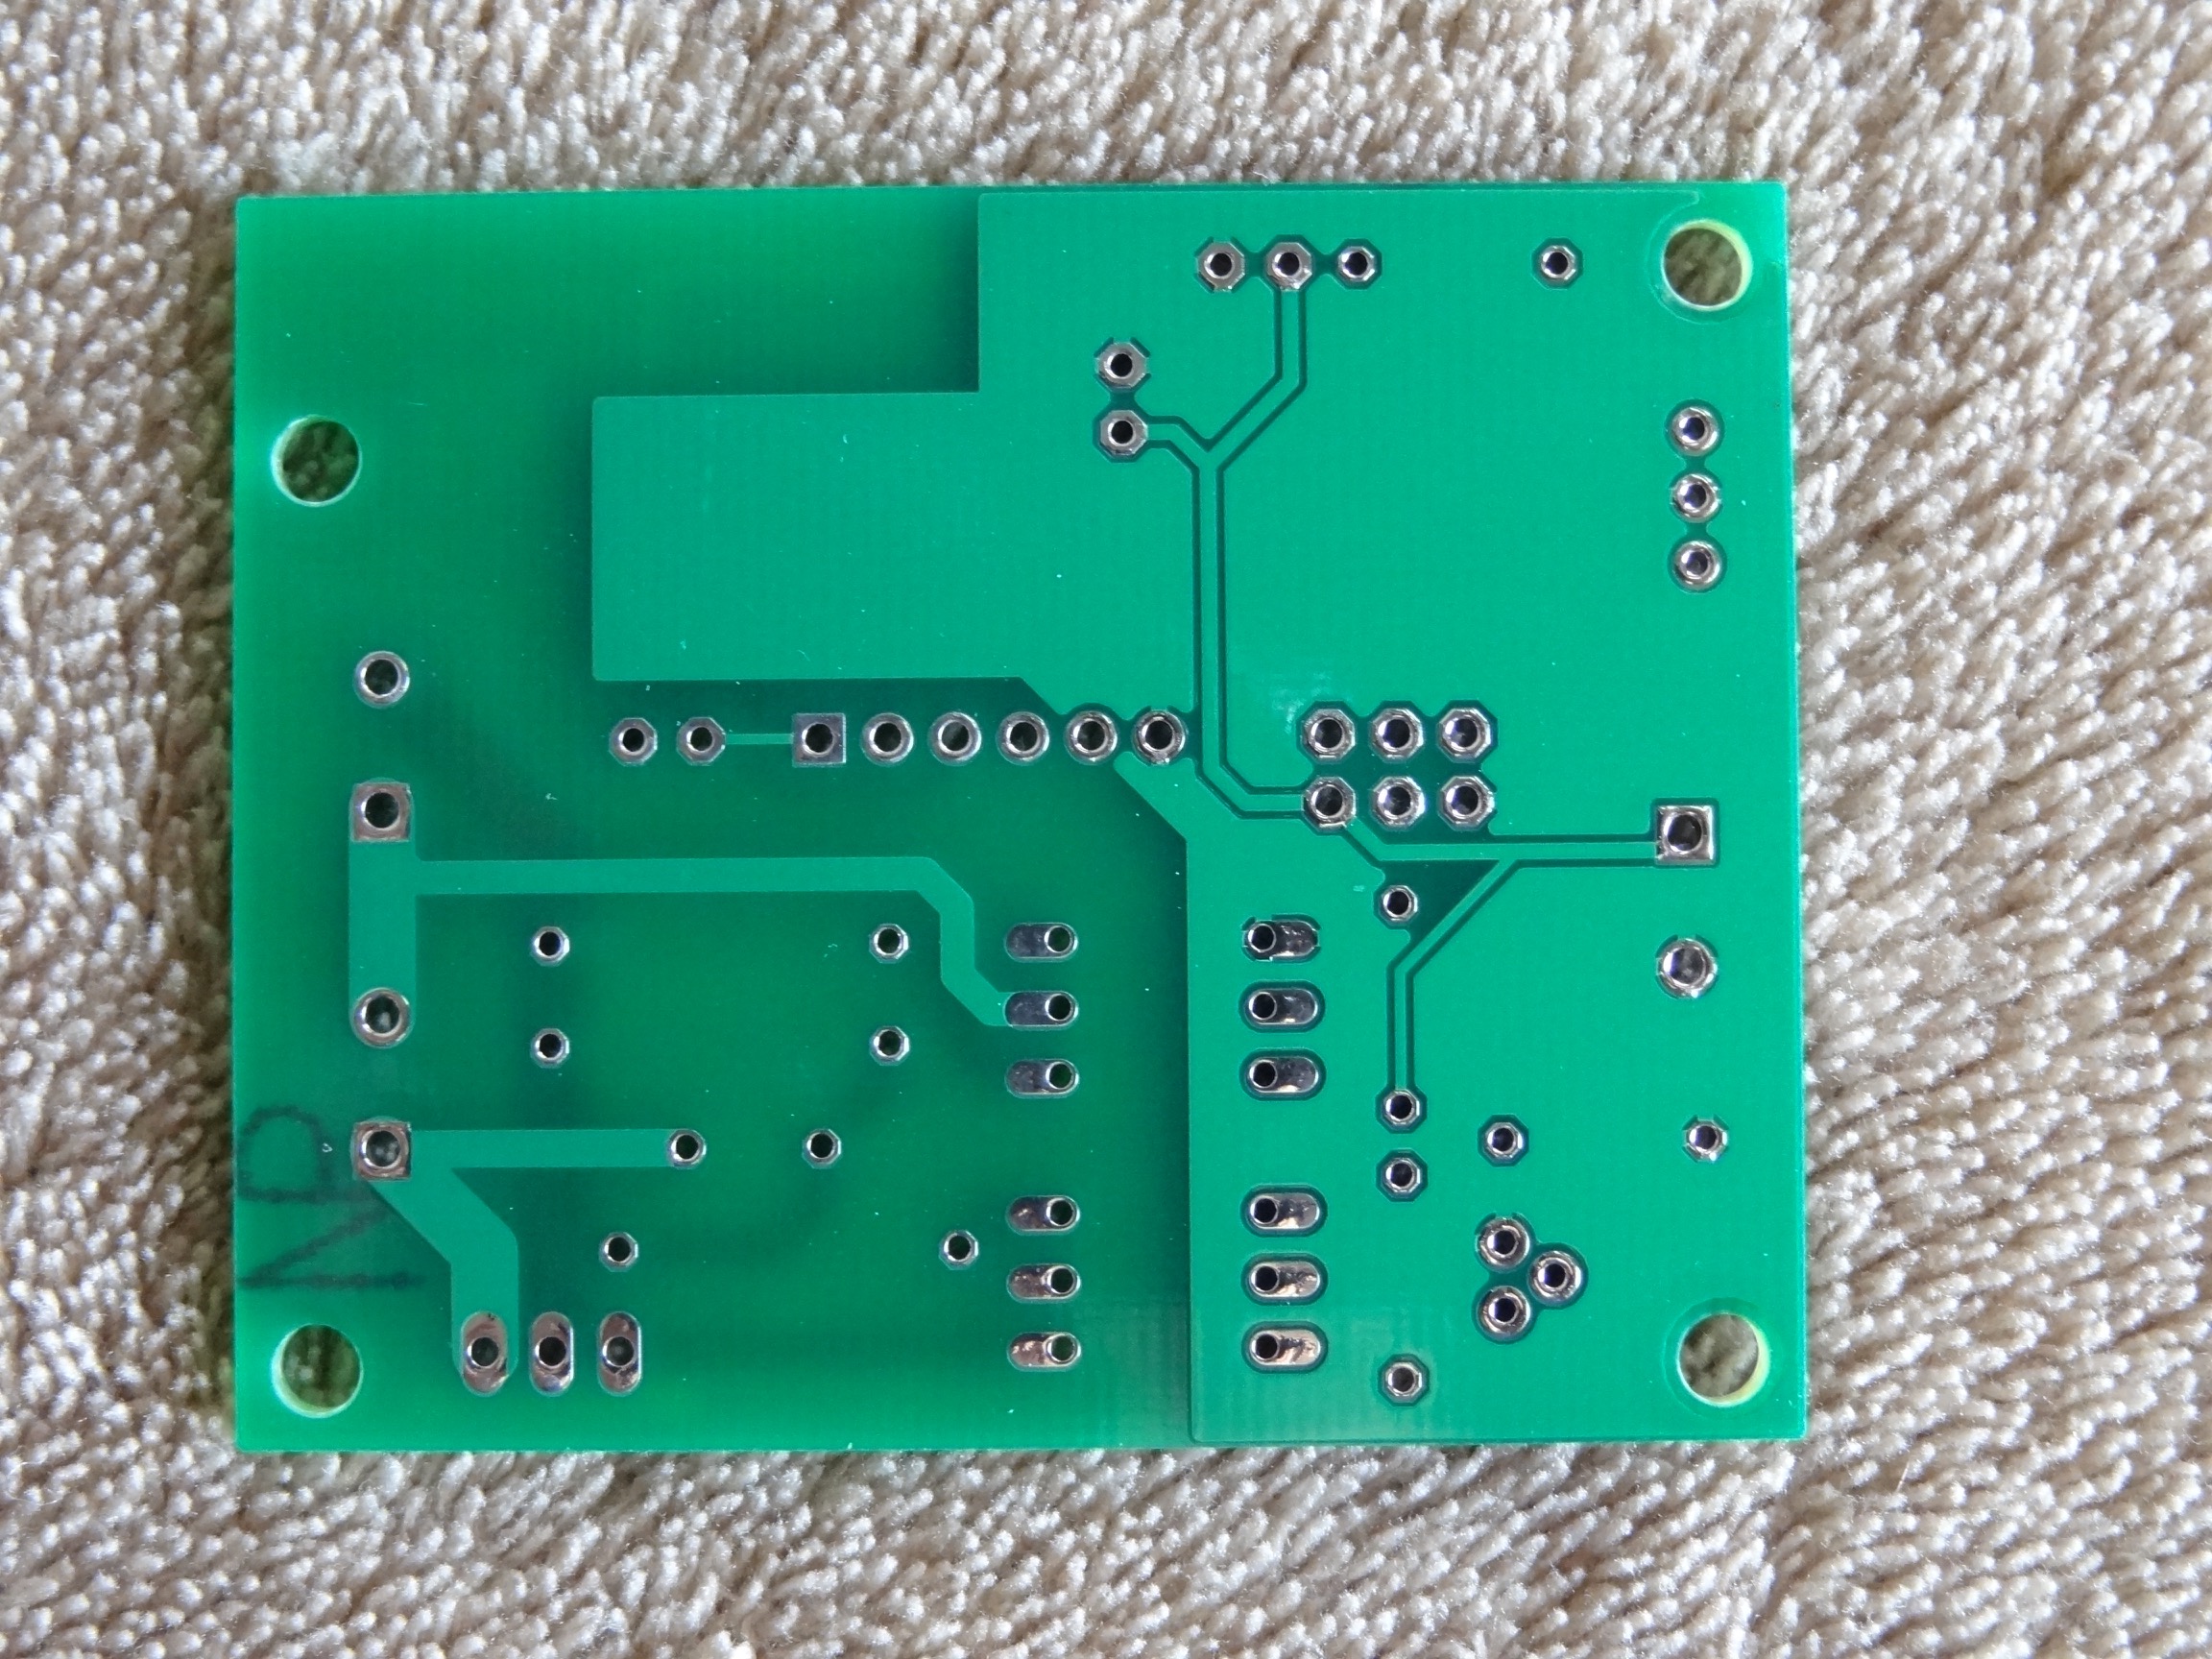
EagleCAD Circuit
EagleCAD Board
Resulting PCB
Assembly Photos


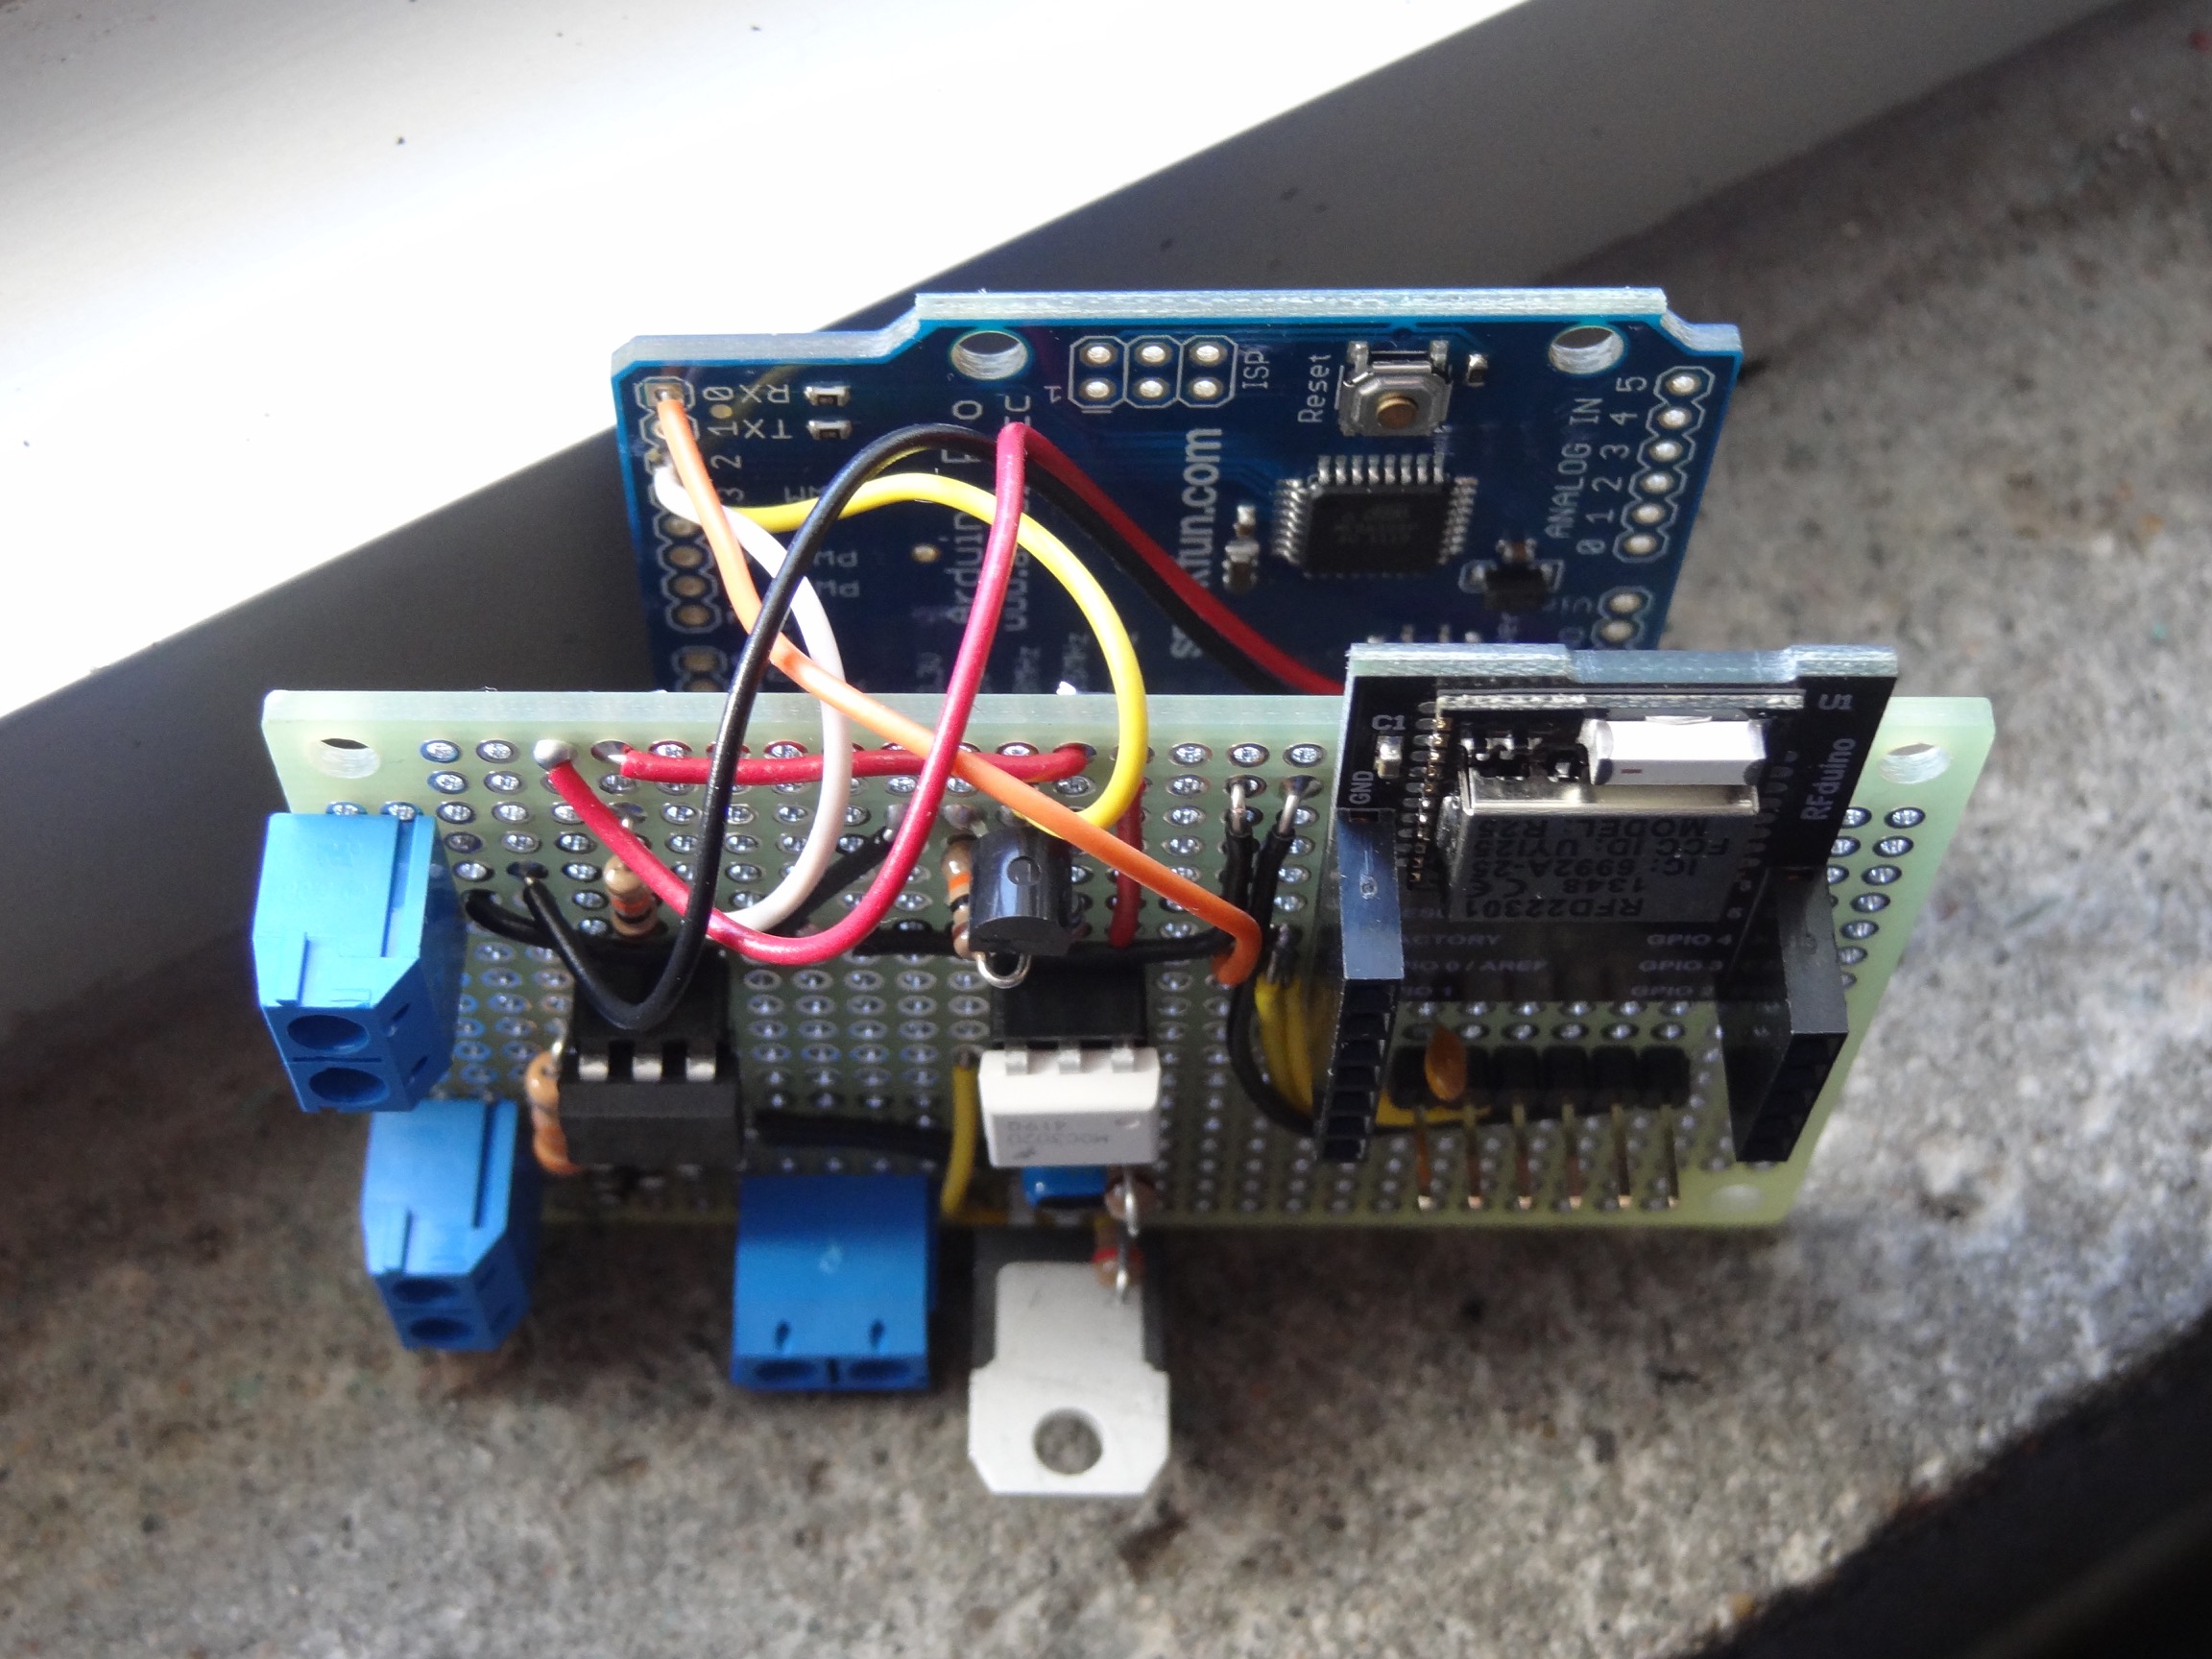
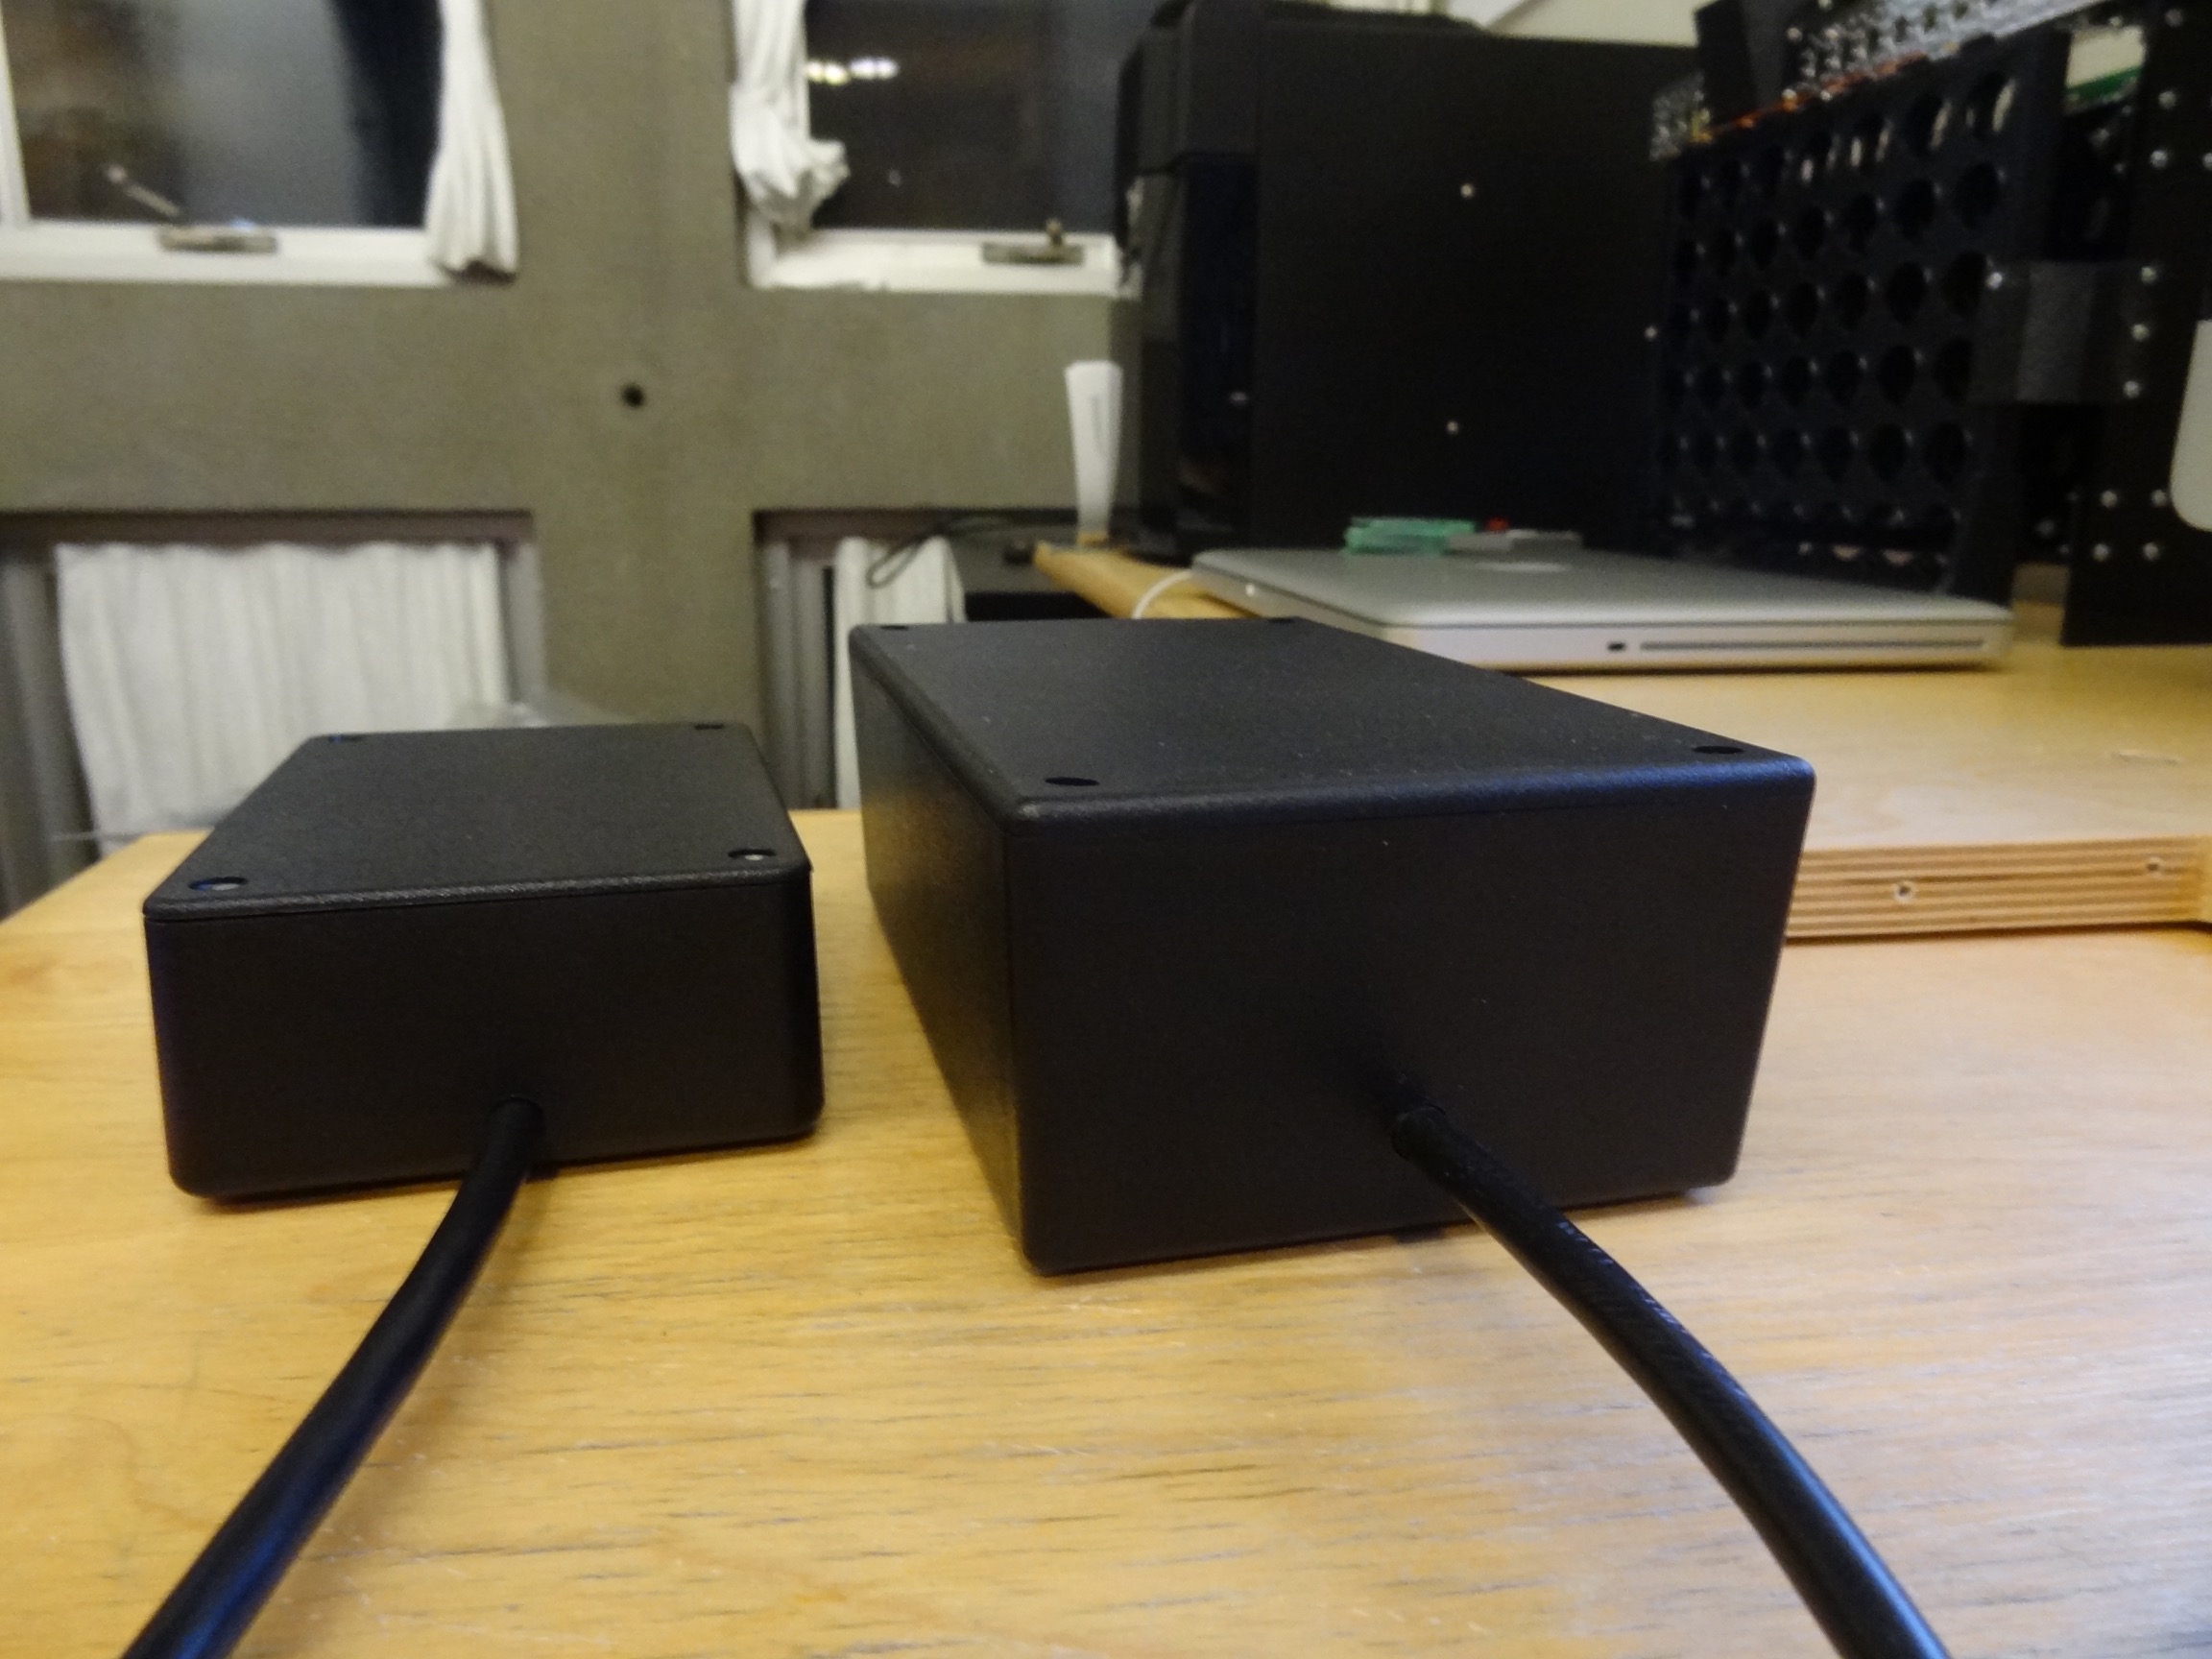
Comparison
Here is just a comparison of the final version of the WakeBright hardware and the original prototype. You can see that the newer version is much smaller.


WakeBright App
I also wrote the WakeBright iPhone app that controls the WakeBright hardware. When the alarm is not set, the user is greeted with the "set alarm" screen. The user can either tap the screen or the "edit" button to get to the alarm editing screen.
The alarm editing screen is where the user sets all of the alarm information. There is an enable/disable switch that the user can use to turn the alarm on and off. There is a date-picker that allows the user to choose a day and a time for the alarm. There is a stepper for the "brightening duration." This sets how many minutes before the alarm that the lamp should begin to brighten. For example, if the alarm is set for 9:30am and the brightening duration is 30min then the lamp will begin to brighten up the room at 9:00am and it will be fully bright at 9:30am. Lastly, there is a "repeat daily" switch that will repeat the alarm every day at the set time.
When the alarm is set the main screen displays the alarm time and the time that the artificial sunrise will begin. This screen also has a small light bulb icon in the bottom right-hand corner. The user can tap this icon to toggle the lamp on and off. The icon also indicates Bluetooth connectivity to the WakeBright hardware. The icon is white when connected and black when disconnected.
Besides brightening the room, the app also makes an audible alarm sound at the specified time. It does this by sending a push notification with a 30 second sound clip. In order for that to work, the iPhone must not be on silent and the volume needs to be turned up. This is one of the limitations with making an alarm app for IOS.
When in the background the app is not allowed to just wake itself up and start running code. So to begin brightening the lamp at the specified time required some additional, minor work. To accomplish this, the WakeBright hardware sends a message over Bluetooth to the app every second. The app is allowed to subscribe to these incoming messages and wake-up to process them. This allows the app to wake-up, check the time, and if necessary send a new brightness level to the WakeBright hardware.
The app also has some small features for convenience. The app saves all of the current alarm settings and can restore them if the app is completely closed and reopened. The app will also automatically set the date-picker on the alarm editing screen to the next day (with the same time) after the alarm goes off.


